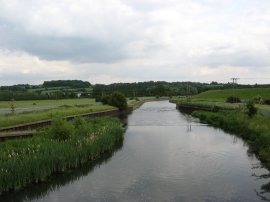
(1) River Stort, Bishops Stortford
(2) River Stort, Bishops Stortford
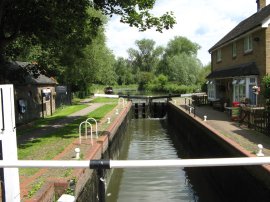
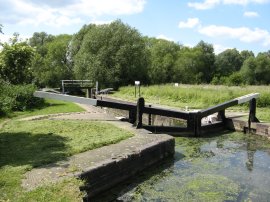
(3) South Mill Lock No 1
Other Links >>> |
|
RIVER STORT NAVIGATION + Beyond
I did this walk on the 5th June 2008. I had taken the day off work as some furniture was being delivered however I was not needed at home and thus, rather than cancel the day off and go into work, I decided to go for a walk instead. In just over two weeks time I am going to try and walk the Tunbridge Wells Circular Walk which is about 27.5 miles in length and thus I decided to take the opportunity to do a relatively long walk to help build up to that distance. After a little thought I took the train to Bishops Stortford in order to walk down the River Stort Navigation. I had never walked the complete length of the Stort Navigation before and it would also allow me to continue down the River Lea towards home afterwards. A single ticket to Bishops Stortford from Tottenham Hale cost a whacking £9.70 and I arrived in the town just before 10:00am.
|
|
|
|
(1) River Stort, Bishops Stortford |
(2) River Stort, Bishops Stortford |
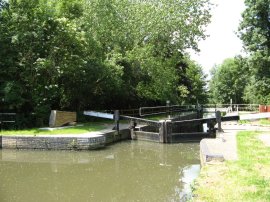
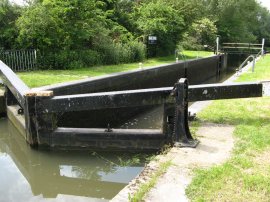
(3) South Mill Lock No 1 |
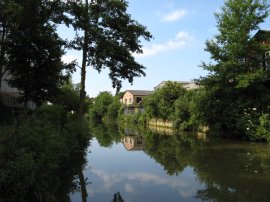
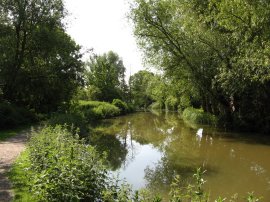
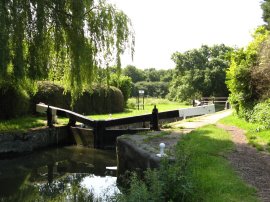
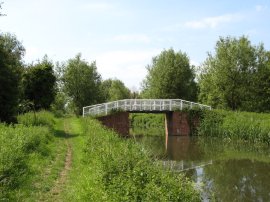
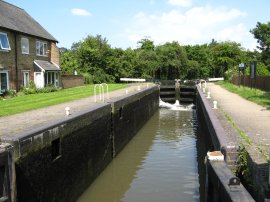
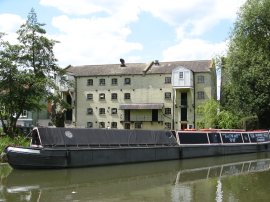
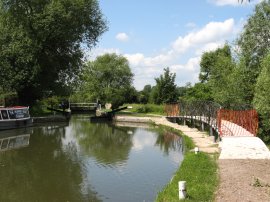
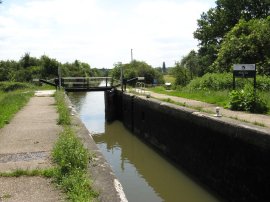
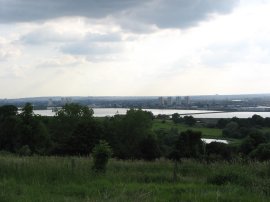
From the station it was just a short walk through the town to reach the banks of the River Stort, photo 1, which I started following through the town back down towards London. Along the banks of the Stort near Bishops Stortford there was lots of new building taking place, as has happened in numerous places elsewhere along the nearby river Lea, the old industrial buildings steadily being replaced by housing. Near the edge of town I passed under a big new shiny pedestrian bridge had been erected over the river although it was not yet open. As I made my way through Bishops Stortford I also briefly linked up with the route of the Hertfordshire Way that I had walked the previous year, photo 2. After a short distance I soon reached South Mill Lock, photo 3, the first of the 15 locks that control the flow of water on the River Stort Navigation on its journey down to the River Lea.
 |
 |
 |
(4) Twyford Lock No 2 |
(5) Bridge nr Twyford Lock |
(6) Spellbrook Lock No 3 |
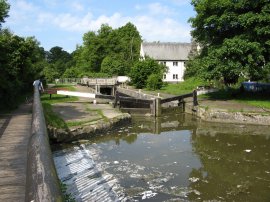
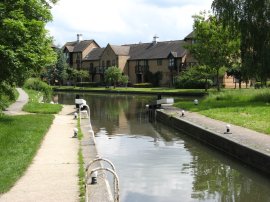
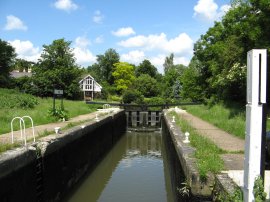
Leaving the built up area the route heads past the Essex Wildlife Trusts Bushey Meads Nature Reserve and down to cross over Twyford Weir, just before the Twyford Lock, photo 4. Here I once again rejoined the route of the Hertfordshire Way for a short distance down to the footbridge in photo 5. The day was bright and sunny and there were a large number of flowers lining the river bank, including yellow iris's and lot of Dog Rose and I also saw the occasional dragonfly close to the waters edge. The canal water itself was quite brown and muddy as if it had been recently disturbed although I did not spot any obvious reason for this. The path continues on to reach the third lock, Spellbrook lock, photo 6, which was very much under the flight path to the nearby Stanstead Airport.
 |
 |
 |
(7) Goods Train nr Sawbridgeworth |
(8) Tednambury Lock No 4 |
(9) Sawbridgeworth Lock No 5 |
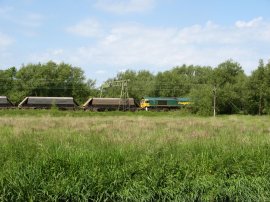
Parts of the path along the river bank run quite close to the railway lines that I had travelled up from London on and a number of trains made there way past as I was walking down stream, photo 7. However despite the occasional noise from the planes and trains the path alongside the river takes a generally very peaceful and green route through the countryside. The river flows in a gentle loop round Tednambury Farm before passing the Tednambury Lock, photo 8. A little further on the path passes under the railway lines which cross the river on a very low bridge named Kecksy's Bridge and continues on to Sawbridgeworth lock which is on the outskirts of the town, photo 9.
 |
 |
 |
(10) Swan and Cygnets |
(11) Sheering Mill Lock No 6 |
(12) Freakes Lock No 7 |
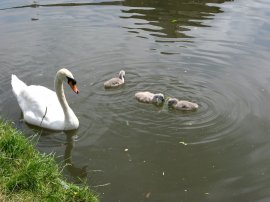
Below the lock the route crosses a road, close to Sawbridgeworth Station, and continues alongside the river between Sawbridgeworth and Lower Sheering where I spotted a Swan with a number of small cygnets, photo 10. The route crosses another minor road by Sheering Mill Lock, photo 11, where the route is crossed by a number of recreational paths. Two of these, the Stort Valley Path and the Three Forest Way, I have walked (although a long while before I started writing up my walks), and the Harcamlow Way, which I haven't walked, yet!. Leaving Sheering Mill Lock the path is soon heading back out into open country between fields and meadows down to reach Freakes Lock, photo 12.
 |
 |
 |
(13) Harlow Lock No 8 |
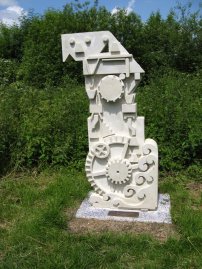
(14) Latton Lock No 9 |
(15) Mill, by Nicola Burrell |
From here it was on down stream towards Harlow Lock, photo 13, as the course of the river changes from running in a generally Southern direction to a more Westerly course. The River Stort skirts the edge of the Harlow, passing near to an industrial estate on the left hand bank of the river, although this remaining reasonably obscured from view by trees. The route heads past the 9th lock, Latton Lock, photo 14, where close to the lock was the sculpture in photo 15 by Nicola Burrell entitled "Mill" which forms part of the River Stort Sculpture Trail 2007. A short distance further the path takes a bridge over the river to run through a section of parkland alongside the other bank.
 |
 |
 |
(16) Burnt Mill Lock No 10 |
(17) Path nr Parndon Mill |
(18) Parndon Mill |
The route continues along a sealed path through the pleasant riverside parkland, passing the Moorhen Marina and pub on the opposite bank before passing besides the ugly concrete buildings of Harlow Town Station. A short distance further the path reaches Burnt Mill Lock, photo 16. The path soon heads under the busy A414 road and once again heads back out into more open countryside, photo 17, as it makes its way down to Parndon Mill, photo 18. This was originally a flour mill however since the sixties it has been occupied by artists and craftsmen who have gradually restored the premises.
 |
 |
 |
(19) Parndon Lock No 11 |
(20) Hunsdon Lock No 12 |
(21) Hunsdon Lock No 12 |
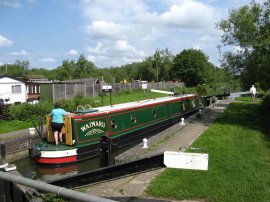
Besides the Mill is Parndon Lock, photo 19, the 11th lock passed so far, where a small new bridge was being constructed over a flood overflow channel besides the canal. From the lock the river makes its way over open country towards the village of Roydon. For a while the path is running quite close to the A414 before reaching Hunsdon Lock, photos 20 and 21.
 |
 |
 |
(22) Roydon Lock No 13 |
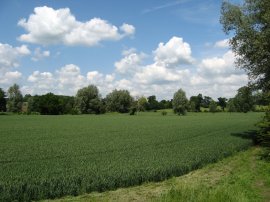
(23) Fields nr Roydon Lock |
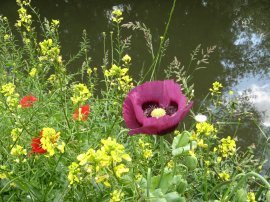
(24) Poppies |
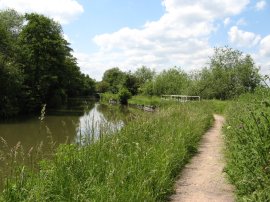
Leaving the lock the path runs alongside the Hunsdon Mead Nature Reserve which is managed by the Herts and Middlesex Wildlife Trust. According to a sign the 67 acre site is "one of the finest hay meadows in Britain and one of the few places still operating the ancient Lammas System." To the left the path passes Roydon Mead and heads on to reach Roydon Lock, photo 22. Photo 23 was taken looking out over the fields just below the lock. A little further on the path passes back under the railway lines at the edge Roydon where I passed a number of bright purple poppies growing besides the path, photo 24.
 |
 |
 |
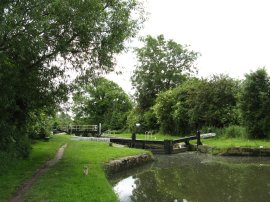
(25) Brick Lock No 14 |
(26) Roydon Lower Lock No 15 |
(27) River Lee Junction |
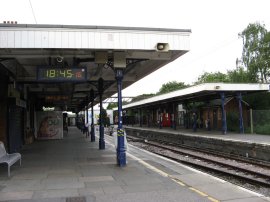
The route then soon crosses a road right besides Roydon station. (The number of stations in close proximity to the riverside path makes this a very accessible walk to those who only want to walk short distances). Once over the road the path heads down the driveway towards Roydon Mill before taking a footpath off to the left that runs a few yards away from the actual river bank. To my left was a field with a hut surrounded by a large number of small free range chickens sitting in the shade besides the hut or hunting around in the grass. Back besides the Stort, Brick Lock, photo 25, was soon reached. The path besides the lock was being repaired and there was a short detour around the back of the lock keepers cottage before rejoining the riverside path below the lock. Ahead of me I could see the towers of the power station near Broxbourne which indicated how close I was now getting to the river Lea. Ten minutes later I was passing the fifteenth and final lock of the River Stort Navigation, the Roydon Lower Lock, photo 26. From here the path heads past the oddly named Glen Faba which consists of two lakes, both man made, which result from the once thriving sand and gravel extraction industry that existed in the Lee Valley. I stopped here for a late lunch before continuing on to reach the junction of the Rivers Stort and Lea, photo 27.
 |
 |
 |
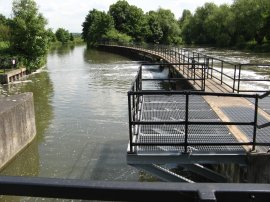
(28) Feildes Weir |
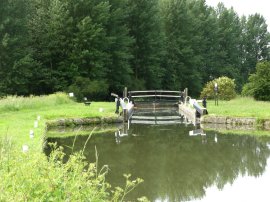
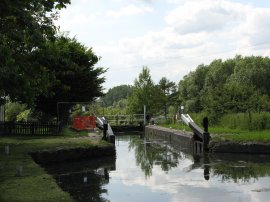
(29) Feildes Weir Lock |
(30) River Lea nr Cheshunt |
The path heads over the large and complicated flood control structure of Feildes Weir, photo 28, before heading round past the lock keepers cottage and Feildes Weir Lock, photo 29 to cross over the River Lea. Here, having completed my walk down the River Stort, I turned to my left and started heading down the River Lea Navigation towards Broxbourne. Passing Dobbs Weir there had been quite a lot of work done on the path besides the River since I had last walked this stretch of the bank and the stretch from Kings Bridge down near Cheshunt, where there is a long straight section of path, has actually been made into quite a wide tarmac path, photo 30, which was not the most enjoyable surface to walk on after 15 or so miles of walking. The path is complete with little speed humps, I presume for bicycles. I was quite familiar with the next stretch of path and in the next hour I only took one photograph as I made my way down alongside the Lea Valley Navigation.
 |
 |
 |
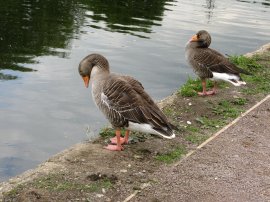
(31) Greylag Geese |
(32) River Lea |
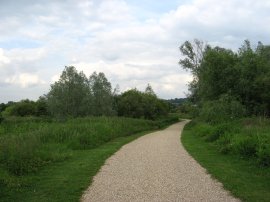
(33) London Loop, Sewardstone Marsh |
I continued on down the river Lea for a total distance of about five miles, passing under the M25, and heading down to Enfield Lock. Here I joined up with the route of the London Loop which I then followed as it made its way up into Epping Forest and over to Chingford. Leaving the River Lea Navigation the route follows the course of the old river Lea round the top of the King George's Reservoir. Photo 32 was taken from the bridge over the river with the views of Epping Forest in the distance. Just before I reached the bridge the GPS showed I had walked 20 miles. The route then crosses Sewardstone Marsh along a broad bonded gravel path has been constructed since I was last here, photo 33, to reach Goodwin Close.
 |
 |
 |
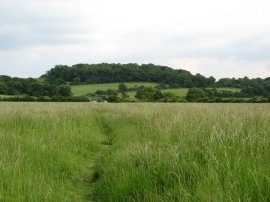
(34) Approaching Barn Hill |
(35) View over North London |
(36) Chingford Station |
At the end of the short close the route crosses the A112 Sewardstone Road and heads over fields, photo 34, up to a track that runs up towards Barn Hill. Looking back down the path there were good views across the King George's and William Girling Reservoirs and over North London, photo 35. From Barn Hill I then followed the London Loop down to the road at Daws Hill which I followed into Bury Road. I then followed this road down to the A1069 and Chingford Station, photo 36, missing out the little loop the London Loop makes at Hawk Wood.
Reaching Chingford Station I had walked a total of 22.8 miles. This had been a particularly pleasing walk as it was not one I had been expecting to do. At almost 23 miles it is the longest I can remember walking. Despite the distance it had been a fairly easy and level walk on good paths besides the river with the only hill being the climb up to Epping Forest at the end. After about 16 miles I had felt quite tired but after a decent rest I definitely was able to pick up my pace again. The total time it had taken was 8 hours 45 minutes although I kept up a walking average speed of 3 miles an hour. Reaching the station I had taken 115 photos which probably accounted for a considerable amount of stopping time. Even if it takes only 30 seconds to stop take out my camera, take the photo and put the camera away again that still equates to almost a whole hour spent taking photo's and not walking! Having accomplished this walk I felt much more confident about completing the 27.5 miles of the Tunbridge Wells Circular in a couple of weeks time.
If you would like to comment on this walk you can do so here:
![]() Back to:Walk index page
Back to:Walk index page
| ©2012 Bertuchi.co.uk. Please contact me using the email button on the right if you have any questions or comments regarding the site. Any feedback and additional information about places of interest on the walks is always welcomed. All rights reserved. Please contact me if you want to use any of the images or information from the site. ENJOY YOUR WALKING |
|