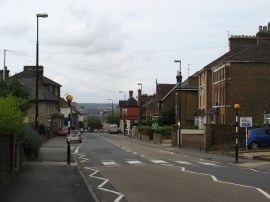
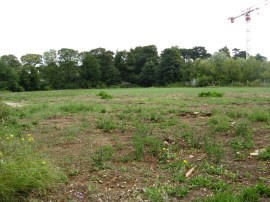
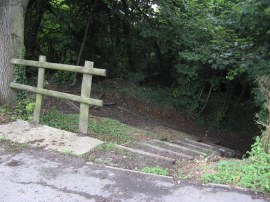
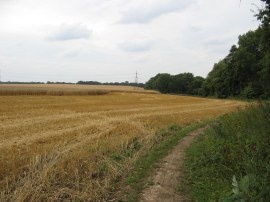
(1) Boxley Road, Maidstone
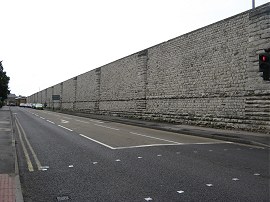
(2) Maidstone Prison walls
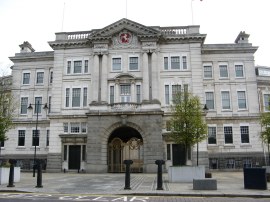
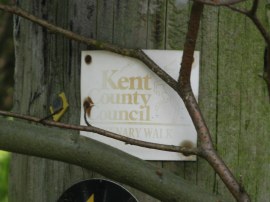
(3) Kent County Council Offices
Other Links >>> |
|
MAIDSTONE CENTENARY WALK
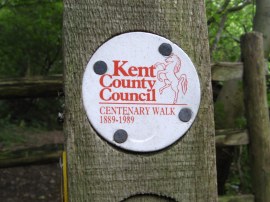
I did this walk on Sunday 15th August 2010. This circular walk is one of a number devised by Kent County Council as part of its centenary year celebrations in 1989 although I have been unable to find out any other details about the walks apart from the routes as shown on the Ordnance Survey maps. I walked the Canterbury Centenary Walk in early 2009 and there is also a Rochester Centenary Walk shown on the OS map although the route appears somewhat harder to follow. Dec 2011 - The Maidstone Centenary Walk path appears to be no longer marked on the most recent OS Explorer map.
Being a circular walk I first needed to decide where to start and in what direction and for this walk I ended up starting at Penenden Heath and walking in a clockwise direction. Peneden Heath is very close to the M20 and thus easy to get to and the one dull part of the walk, heading along the Boxley Road towards the centre of Maidstone, is accomplished at the very start of the walk. I had developed a heavy cold the day before and had hoped that the fresh air and exercise might help clear my head however my nose kept streaming throughout the walk which was rather irritating.
|
|
|
|
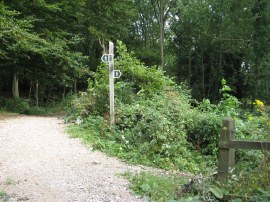
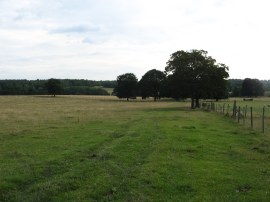
(1) Boxley Road, Maidstone |
(2) Maidstone Prison walls |
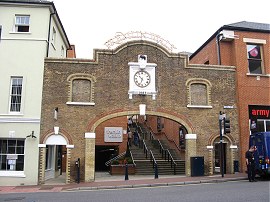
(3) Kent County Council Offices |
From my parking spot in Heathfield Road I headed downhill along the Boxley Road, photo 1, to eventually reach the tall ragstone walls of Maidstone Prison, photo 2. Here the route turns to the left along the Lower Boxley Road before following the walls of the prison round to the right along County Road. Reaching the end of the prison complex the route passes the offices of Kent County Council, photo 3, quite apt given that the walk was celebrating their centenary.
 |
 |
 |
(4) St Faith's Church, Maidstone |
(5) Fremlin Walk Shopping Centre |
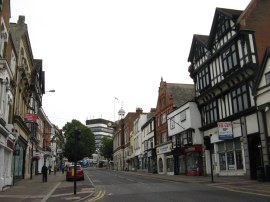
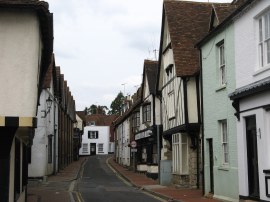
(6) Maidstone High Street |
The route then crosses Week Street and heads down besides Maidstone East Station, which would make a good start point for those using public transport, before climbing a few steps up into Brenchley Gardens. I had spent a few years living near Maidstone as a child and this was an area I knew quite well although had not visited for years. Passing St Faith's Church, photo 4, the Centenary Walk heads into St Faith's Street and crosses over the road to pass through the Fremlin Walk shopping centre. This was opened in 2005 on the site of the old Fremlins Brewery although the only original building from when the site was a brewery is the arch entrance and clock, photo 5. Leaving the shopping centre I headed along Pudding Lane to the High Street, photo 6.
 |
 |
 |
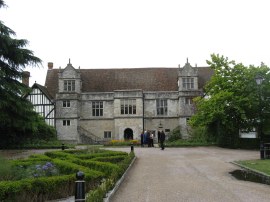
(7) Archbishops Palace, Maidstone |
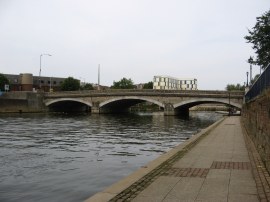
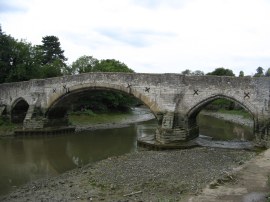
(8) Maidstone Bridge |
(9) Whatman Way |
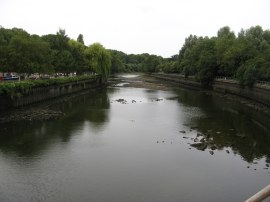
Here the route continues ahead along Mill Street and crosses over the Bishops Way and into the grounds of the Archbishops Palace, photo 7, which is an historic 14th-century building on the banks of the River Medway which was traditionally a home from home for travelling Archbishops from Canterbury. The route then heads down through the palace grounds to join the path that runs alongside the River Medway. This riverside path is then followed all the way to Aylesford. The path heads under the two road bridges, photo 8, in the centre of the town and a little bit further passes under the rail bridge by Maidstone East station. Not far from here I made a very short detour away from the path to look at Whatman Way, photo 9, which is the proposed site of the new ground for Maidstone United football club; if they ever find the finance to construct it. As of Dec 2011 construction of the ground is well under progress and should open for the start of the 2012-2013 season.
 |
 |
 |
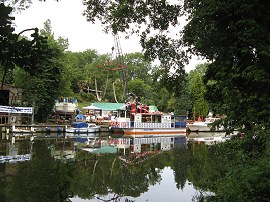
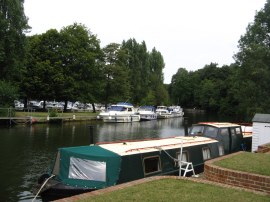
(10) Boatyard nr Allington |
(11) Allington Marina |
(12) Approaching Allington Lock |
A tarmac path runs besides the river all the way to Allington Lock and it was very easy walking downstream along the river which was being well used by canoeists and rowers when I went by. The route passes a small boatyard and Allington Marina, photo 11. A few yards further Allington Castle could just be made out through the trees on the opposite bank. Approaching Allington Lock and sluice, photo 12, there were a number of interesting boats, mainly Dutch built barges, moored at the river bank, each with a little description of the history of the boats. I also spotted a number of ships cats sunbathing on deck.
 |
 |
 |
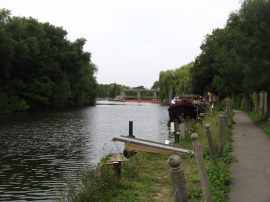
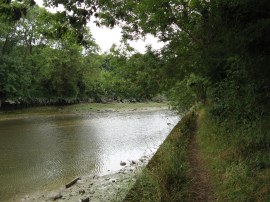
(13) River Medway below Allington Lock |
(14) River Medway below Allington Lock |
(15) Cobtree Wharf |
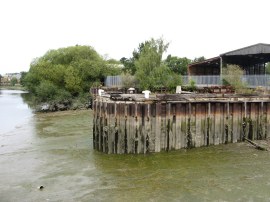
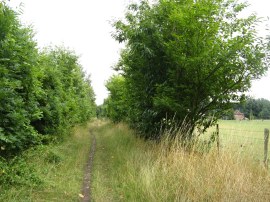
Below the lock and sluice the tarmac path ends and the route joins a much narrower unsurfaced path, photo 13, running alongside the river which from this point is now tidal, photo 14. The path was really quite overgrown in places and my pace slowed considerably as I made my way carefully along the path which was often right at the edge of the riverbank. The route passes under the M20 and heads towards Cobtree where the route skirts round an old, disused wharf, photo 15.
 |
 |
 |
(16) Heading towards Aylesford |
(17) Aylesford Bridge |
(18) Aylesford High Street |
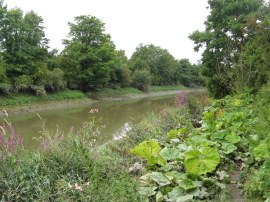
The path briefly passes a small industrial estate before once again heading along the overgrown riverbank path, photo 16, towards Aylesford. Eventually the medieval bridge in Aylesford, photo 17, comes into sight which marks the end of the routes passage alongside the River Medwya. Reaching Aylesford the route turns to the right along the High Street, photo 18, for a few yards before bearing to the left along Mount Pleasant. Soon the road is running along a narrow ridge of raised ground with a sand quarry visible through the trees on the left and housing on the right.
 |
 |
 |
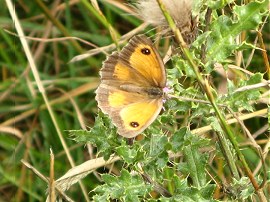
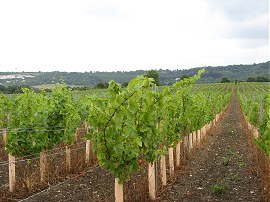
(19) Gatekeeper Butterfly |
(20) Vineyard nr Eccles |
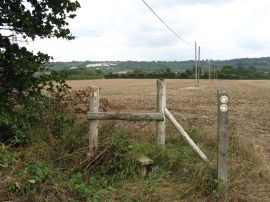
(21) Centenary Walk Way Marker |
Just after the road bends to the right the route joins a footpath on the left that heads along a track between houses to that leads out into an open field. The Centenary Walk heads diagonally to the left across this field towards a path of trees where the route turns to the right. Heading through the trees the path passes a dried up pond before joining another footpath that heads over fields towards the village of Eccles. The route passes under some electricity pylons and just before the footpath reaches the village it also passes a small vineyard, photo 20. As I headed alongside the fields I could see the North Downs gradually becoming nearer ahead of me. Joining Mackenders Lane in Eccles the route continues ahead before taking a footpath on the right that heads out between houses to run alongside a field edge path. Reaching a now redundant stile at the end of the hedge I finally spotted a Centenary Walk way marker nailed to a post, photo 21, that is now hidden by an overgrown tree, proof at last that the route had once been signed on the ground.
 |
 |
 |
(22) Field nr Eccles |
(23) Path heading up to the Downs |
(24) Pink Flowers |
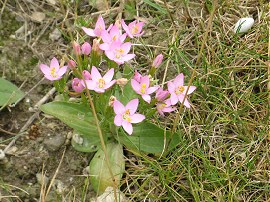
Crossing the stile, photo 22, the route heads over the next field then heads diagonally to the left over a number of small paddock like fields to reach the Rochester Road at its junction with Bull Lane. The road here was quite busy however once across the road I headed along to the left for a few yards before joining a hedge lined track on the right that starts heading uphill towards the North Downs, photo 23. The path climbs steadily, passing a number of old chalk pits on either side of the path and a short distance up I stopped for a brief snack break before continuing uphill. While I was heading up the hill I spotted the flowers in photo 24 growing on the chalky ground however at the time of writing I haven't been able to identify them.
 |
 |
 |
(25) The end of the path up the hill |
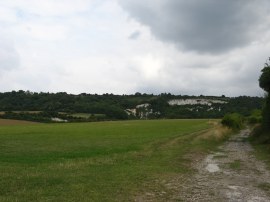
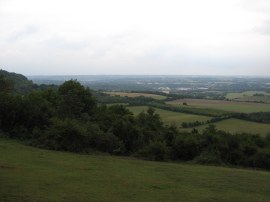
(26) View from Bluebell Hill |
(27) Centenary Walk Way Marker |
As the path nears the top of the hill it joins a an enclosed, sunken lane that climbs more steeply up to join the North Downs Way at the top of the hill, photo 25. Here the route heads to the right along a tarmac path that runs parallel to the A229 however I turned to the left and headed the short distance over to the Bluebell Hill Picnic area from where there were excellent views back over the Medway valley and the ground I had just walked across, photo 26. After another short break admiring the view I retraced my steps to re-join the Centenary Walk which now follows the route of the North Downs Way for the next four or five miles. Having climbed up to the top of the downs the route promptly starts heading back downhill again. The path alongside the A229 leads down to the Chatham Road where the route continues ahead for a short distance before taking a footpath off on the right. Where the Chatham Road bears away from the A229 I spotted another Centenary Walk Way marker attached to a post in the greenery besides the road, photo 27.
 |
 |
 |
(28) Kit's Coty House |
(29) North Downs Way Signpost |
(30) Crossing the Channel Tunnel Rail Link |
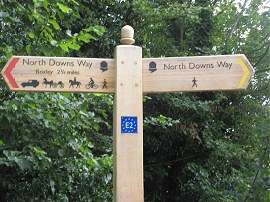
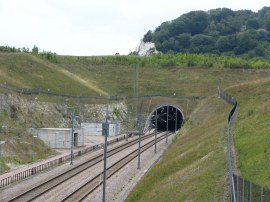
Leaving the Chatham Road the route joins a path which descend down a few steps and then heads downhill along fairly enclosed hedge lined track which leads past the burial mound at Kit's Coty House, photo 28, which are the remains of a Neolithic chambered long barrow. From Kit's Coty the path continues heading quite steeply downhill along a hedge lined track. Crossing a road the route joins a byway that runs along to eventually take a Toblerone shaped tunnel under the A229. Since I had last walked along these paths new wooden North Downs Way signposts, photo 29, had been placed at the road junctions, some given mileage details as well as a pictorial description of the usage of the path, these new signs also have the symbol of the Eurpoean E2 route which in this area share sits route with the North Downs Way. Leaving the underpass the route passes round the back of petrol station and takes a bridge over the channel tunnel rail link, close to where it enters the tunnel under the North Downs, where I stopped for another short break.
 |
 |
 |
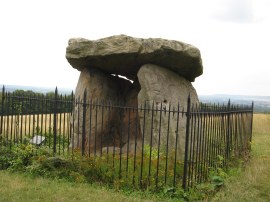
(31) White Horse Stone |
(32) Path, Boxley Warren Nature Reserve |
(33) The top of the Downs |
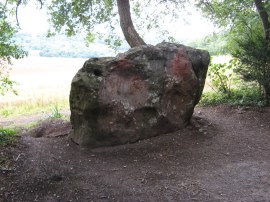
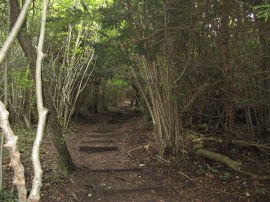
The route then starts heading back uphill through Boxley Warren Nature Reserve. At first the route follows a byway which was being used by some lads on a very powerful quad bike, travelling back and forth, but fortunately soon joins a footpath on the left. On the way uphill the path passes another standing stone, the White Horse Stone, photo 31. In places the route climbed very steeply uphill, including a long flight of wooden steps through the woodland, photo 32. Reaching the top of the downs once again by Westfield Wood, the path turns to the right running along the edge of the woodland with wide open views over the fields on top of the downs to the left, this being the highest part of the walk at 190 metres.
 |
 |
 |
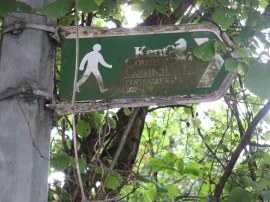
(34) Centenary Walk Way Marker |
(35) Path nr Harp Farm |
(36) Path through Boxley Wood |
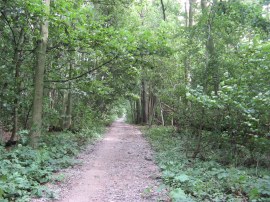
The path then runs along the field edge next to the wood before passing under some electricity, the gap in the trees below the cables giving a rare view down to the valley below. Just past the pylons the route turns to the right and takes a footpath that runs through the trees, just below the edge of the field. At the path junction I spotted a proper Centenary Walk way marker disc attached to a post, photo 34, the only such sign I saw all day, in fact with the other two signs mentioned earlier these were the three only markers I saw all walk. After heading through the woodland path the route joins a track,photo 35, that skirts round the edge of some barns at Harp Farm and continues along over road and along the edge of a field to reach Lidsing Road. Here the way marked route of the North Downs Way is slightly different from that marked on the map which shows the route going along Harp Farm Road, The revised field edge path being preferable to a walk along the road for the Centenary Walk as well. The route heads across the Lidsing Road to join a footpath that runs through Boxley Wood, photo 36, close to the top of the downs.
 |
 |
 |
(37) Path through Boxley Wood |
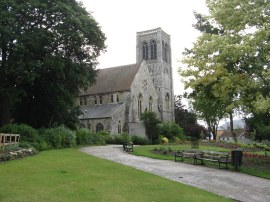
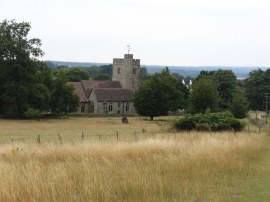
(38) Approaching Boxley Church |
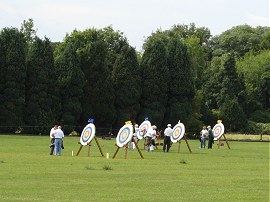
(39) Archers |
Reaching a crossing track, photo 37, the Centenary Walk leaves the route of the North Downs Way and joins a narrow footpath on the right that heads steeply downhill through the trees. The path starts to level out as the footpath heads between fields to cross over the Pilgrims Way. The route then heads alongside a field edge path before heading diagonally to the right across a second field towards the St Mary and All Saints church at Boxley, photo 38. To the right of the field in the grounds of the European School of Osteopathy an archery competition was taking place, photo 39.
 |
 |
 |
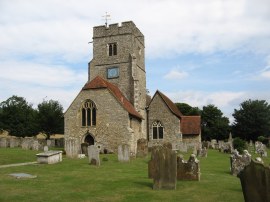
(40) St Mary and All Saints church at Boxley |
(41) Fields nr Boxley |
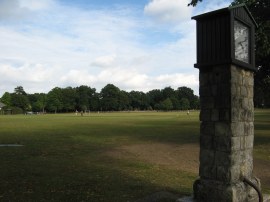
(42) Penenden Heath |
I had one final short rest in the churchyard, photo 40, before joining a path which runs alongside the churchyard and into another field. Just past a house on the right the route turns to the right along a footpath which heads down to join a track which leads out into fields which were being grazed by sheep when I went through. The route then heads along the field edge path, photo 41, to reach a bridge that carries the route back over the channel tunnel rail lines. Here the path bears to the right across the field, then follows the field edge of the next field to reach a surfaced lane, Sandy Lane. Here the Centenary Walk heads to the left, passing through the trees of Kiln Wood to reach a subway under the M20 motorway. Continuing ahead the path soon reaches Penenden Heath, photo 42. I then headed across the heath before crossing Penenden Heath Road to head gently uphill along Boxly Road for the short distance back to where I had parked my car.
Reaching the car I had walked 15.0 miles, 14.7 of which had been on the Centenary Walk and the extra 0.3 miles the diversion to and from the Bluebell Hill picnic site. I had been unsure what to expect from this walk but it turned out to be one of the most enjoyable walks I had done all year; despite my heavy cold. It was interesting to walk with a good mix of town, river and country walking including the 4.5 mile stretch of the North Downs Way which managed to incorporate two climbs up the downs. It is a shame that the route no longer seems to be way marked or publicised by the council, living on only on the Ordnance Survey maps. If anyone reading this page knows any more about the Centenary Walks in Kent I would be interested to hear from them, this is one walk that is too good to be forgotten.
As usual I have uploaded the route of the walk which can be accessed here: Maidstone Centenary Walk route.
If you would like to comment on this walk you can do so here:
![]() Back to:Walk index page
Back to:Walk index page
| ©2012 Bertuchi.co.uk. Please contact me using the email button on the right if you have any questions or comments regarding the site. Any feedback and additional information about places of interest on the walks is always welcomed. All rights reserved. Please contact me if you want to use any of the images or information from the site. ENJOY YOUR WALKING |
|