Roach Valley Way
Other Links >>> |
|
ROACH VALLEY WAY
Circular walk from Rochford
|
|
Roach Valley Way |
I did this walk on Sunday 14th August 2011. I had had a disturbed nights sleep with a rather dodgy stomach but thought I would head out anyway to do this walk as it was the first time I had been able to go out walking for four weeks. I could always cut the walk short if I felt too bad and set off hoping that I would be able to walk off whatever was causing me the discomfort. I drove over to Rochford where I parked in a car park just off South Street. Fortunately this is free to park in on Sundays unlike the station car park that had wanted £5.30 for the day which had been my first choice of parking spot.
 |
 |
 |
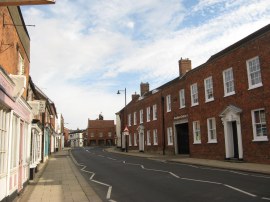
(1) South Street, Rochford |
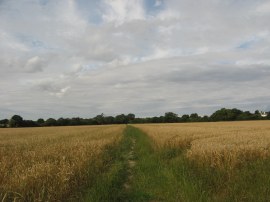
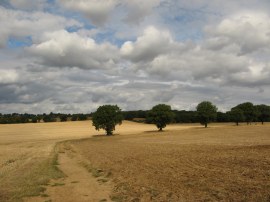
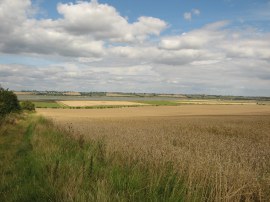
(2) Field by Hall Road |
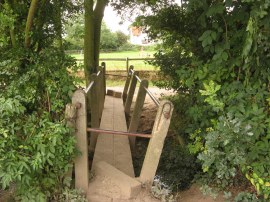
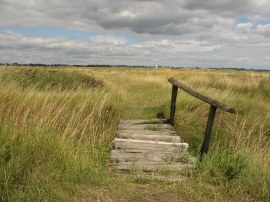
(3) Footbridge nr Blatches Farm |
From the car park I headed down to South Street, photo 1, where I started the walk along the Roach Valley Way. The route headed to the left down the road before turning to the left down West Street. This runs down to a road junction, close the station where I headed to my right before turning to the left under the railway bridge at the end of the road. The route then heads along Hall Road, past a number of impressively large houses, before taking a footpath that bears to the left across a wheat field, just past the end of the last house, photo 2. Reaching the end of this field the route crosses across a few planks over a drainage ditch and then over a stile where I was pleased to spot a way mark for the Roach Valley Way. Crossing over another stile the route heads over the playing fields of Ashingdon Town Youth FC before heading through a car park to cross the rather busy Cherry Orchard Way. Once over the road the route runs along the edge of the Cherry Orchard Jubilee country park which was very popular with dog walkers out for their morning strolls. This section of path is followed up to the buildings of Blatches farm with fields to the right. Reaching the farm the route turns sharp right, crossing a rather lopsided concrete bridge, photo 3, over a drainage ditch and then heading gently uphill between fields.
 |
 |
 |
(4) Heading towards Gusted Hall Lane |
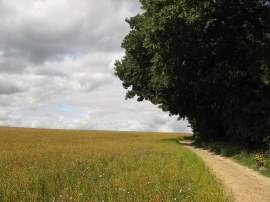
(5) Roach Valley Way nr Gusted Hall |
(6) Path besides Hockley Wood |
Passing through a gate the route continues ascending gently between paddocks, the path running just to the right of a house prominent on the horizon. The route then heads to the left along a concrete track and where this bends to the right, continues ahead along a fence lined path running across the top of more paddocks. Away to my left were views over to the buildings of Southend rising above the surrounding farmland. The route then heads though a gate and along the edge of a large field with an area of woodland away to the left. The path then crosses an open area, photo 4, before passing into a small patch of woodland. Leaving the trees the path heads through a a small parking area at the end of Gusted Hall Lane. Here the Roach Valley Way heads briefly to the right before turning to the left along a surfaced driveway which leads up to Gusted Hall. Reaching the buildings the path then continues ahead along a footpath that runs around the top edge of a field with woodland on the right. The route then continues ahead along a very attractive section of path running between fields, photo 5, that leads up to Hockley Woods. Away to the right a tractor was ploughing the recently harvested fields, the tractor being closely followed by a small flock of seagulls. On my rather old copy of the OS explorer 175 map there are some electricity pylons shown as crossing over this area although I could not see any sight of them on the ground. Reaching Hockley Woods the route heads to the left along the edge of a field, planted with a low growing crop that had blue flowers and small seed heads, photo 6. I had no idea what this was although on closer inspection of the seeds they could be linseed.
 |
 |
 |
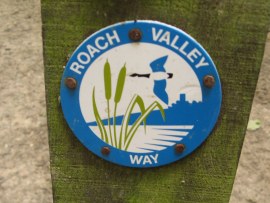
(7) Way Marker |
(8) Hockley Wood |
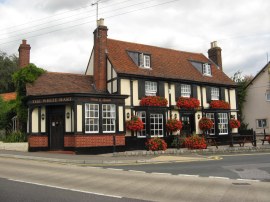
(9) White Hart Pub, Hockley |
Reaching the end of the field the route heads to the right into Hockley Woods and I was a little uncertain of the route here. First I turned sharp right along a path that led back, parallel to the way I had come, close to the top edge of the field. However on the map the route is shown as running a little lower down so I retraced my steps and headed a bit further into the woods before turning to the right along a very minor track heading through the trees. However at this point I did begin to think that my original choice of route had probably been the correct one, especially as I had seen a Roach Valley Walk way marker on it although at the time I had been unsure whether that had been for the path coming in the other direction from Rochford that I had just walked, which could have been just inside the trees rather than along the field edge path that I chose as it did seem a bit strange to have two sections of path so close to each other. Reaching the end of the minor path I linked up with the correct route and from then on it was comparatively easy to follow the route of the Roach Valley Way, as shown on the map, as it winds its way through the trees of Hockley Wood, photo 8, although the path wasn't that well way marked on the ground. Reaching the far side of the woods the route heads to the right along a short fence lined section of footpath in between houses on the outskirts of Hockley. Reaching the end of this footpath the route heads briefly to the left along Woodlands Road before heading to the right down Kilnwood Avenue. This is followed into Hockley Rise and reaching the end of the road the route heads to the right, passing the modern brick building of Emmanuel Church before crossing over the road by the Hawkswell village sign and heading to the left down White Hart Lane besides the White Hart Pub, photo 9, which had an attractive display of hanging baskets outside.
 |
 |
 |
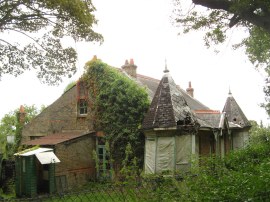
(10) A rather ramshackle house |
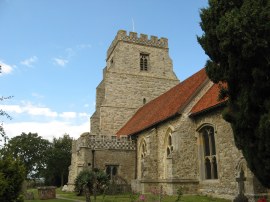
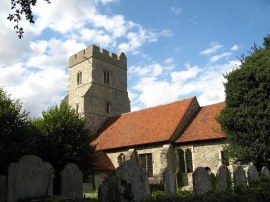
(11) St Andrews Church, Ashingdon |
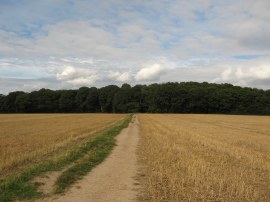
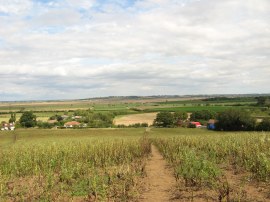
(12) Path leading to Canewdon Road |
Reaching the end of the lane the route continues ahead along a track that crosses a bridge over some railway lines and continues ahead to join a footpath which heads diagonally across a field on the right. Reaching the end of the second field the route crosses a small drainage ditch and bears to the right along a broad tree lined path before crossing over a stile on the left and heading up the right hand side of a large open field, the field surrounded by trees. Somewhere nearby I think there must be a kennels because this stage of my walk was accompanied by the sound of barking form a large number of dogs. Reaching the top of the hill the route heads to the right through a metal kissing gate and along a track that runs up to a farm. From here, away to my left, I got my first brief views of the river Crouch in the valley below. The route then bends to the left, passing by a house before heading through a metal gate to join a tarmac driveway as the route starts to head gently downhill towards Ashingdon. On the way the path headed by a rather intriguing and ramshackle house, photo 10. Reaching the end of The Chase the route heads uphill to the right along Ashingdon Road before heading to the left down Church Lane along a path that runs up to St Andrews Church, photo 11. A church was first built on this site in 1020 by King Canute and much of the current building dates from the 14th century. The hilltop site of the church gave good views over the surrounding countryside and in the distance I could see the church in Canewdon on the next low hill which I would be walking to next. I stopped for a short break on a bench in the churchyard although I was soon harassed by a wasp that just did not want to leave me alone causing me to move on. I had not eaten anything at all during the day up to this point and took a chance and ate half sandwich which hopefully would not upset my stomach further. Leaving the church the route heads downhill across a field, photo 12, to the Canewdon Road which the route then heads along for about a mile
 |
 |
 |
(13) Canewdon Road |
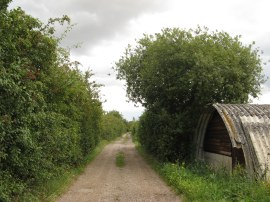
(14) Larkhill Avenue |
(15) Approaching Canewdon |
Even when planning the walk this had been the one part I had not been looking forward to as the road looked as if it had the potential to be quite busy and I correctly deduced that there would not be any pavement running alongside it, photo 13. In places there was not even much of a verge to walk on however the road wasn't that busy and did become more open as I headed down it however it is definitely a stretch of path you need your wits about you. At one point a man was mowing his lawn with a very loud lawnmower which meant I couldn't hear if any cars were coming which was rather annoying. Eventually I reached Pudsey Lane where I was able to leave the road. The route then heads past a few houses before heading to the right along Larkhill Avenue, photo 14, an unmade track that is far less glamorous than it sounds. Reaching the end of the lane the route then continues ahead across the middle of a field with Canewdon church visible on the horizon ahead, photo 15.
 |
 |
 |
(16) St Nicholas Church, Canewdon |
(17) Heading down to the River Crouch |
(18) Wooden Footbridge |
Reaching a house, the Roach Valley Way then bears half right across the middle of the next field along a path that leads up to reach the church, photo 16. The route then heads through the churchyard before continuing on along the small High Street. At a road junction the route continues on, passing a handily located shop, before heading to the left down Gays Lane. This heads out past a few houses to reach a large field where I joined a field edge path that starts descending down towards the River Crouch, photo 17. Having headed along the edge of the first field the route of the Roach Valley Way is shown on the map as curving round to the left towards the farm buildings at Upper Raypitts Farm however on the ground the path continued straight ahead towards a stile and over a rather rickety wooden bridge, photo 18, taking a direct line down to the flood bank lining the River Crouch.
 |
 |
 |
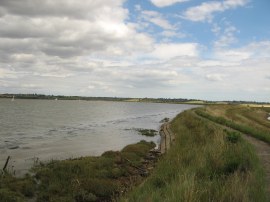
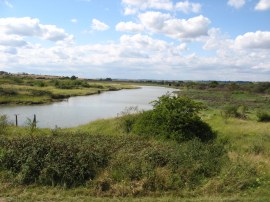
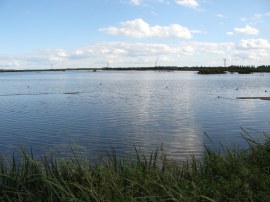
(19) River Crouch |
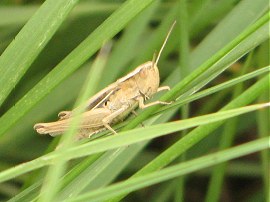
(20) Bush Cricket |
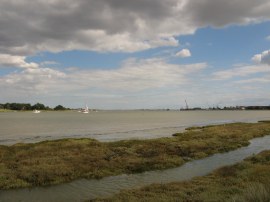
(21) View down the River Crouch |
Reaching the estuary of the River Crouch, photo 19, it was definitely high tide and the water in the channel was noticeably higher than the level of the surrounding fields to the right of the path. The top of the flood wall was initially lined with concrete slabs which made for easy walking as I made my way down river alongside the estuary. Approaching Black Point the paving slabs ended but the top of the path had fairly recently been mown and was still relatively easy to walk along as I headed alongside Easter Reach and then around to Cliff Reach with the Lower Raypits Nature reserve to my right. In the past I have sometimes found the paths on top of the flood walls quite overgrown and was pleased to see that this wasn't the case here. The area was a haven for some small brown crickets, photo 20, which were jumping off in all directions as I made my way along the path. After headed down alongside the estuary for some distance the flood wall starts curving inland along the marshy ground running alongside the edge of Lion Creek. Ahead I could see the cranes of the Essex Yacht Marina and nearby timber yard where there was a large boat moored up and further away in the distance was Burnham on Crouch on the other side of the estuary, photo 21.
 |
 |
 |
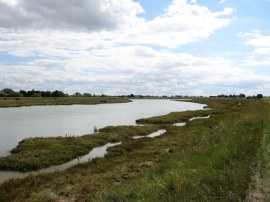
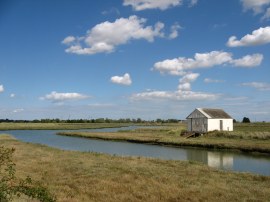
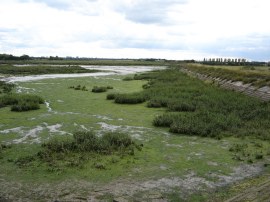
(22) Lion Creek |
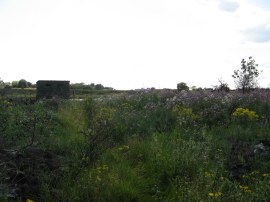
(23) Bird hide by Lion Creek |
(24) Lion Creek SSSI |
Reaching the top of Lion Creek, photo 22, the route bears round to the right, and on the map is shown as heading in a big rectangle round an area of ponds although continuing ahead it was probably little more than a couple of hundred yards along the floodwall to the point where the other side of the path comes back round. However as it was the marked route on the map I decided to continue on round the ponds rather than take the short cut, However this section of path seemed only to lead to a bird hide, photo 23, and not all the way round the ponds as marked and about half way down the stretch of water I could find no trace of the path continuing further, photo 24, so I had to retrace my steps back the way I had come. Back on main flood defence I passed a sign for the Lion Creek SSSI which had a map of the area and this did not show any footpath heading round the edge of the ponds any more and having now looked at the most recent ordnance survey map this section of path has also been re-aligned on that. I did spend a few minutes in the hide although did not see anything interesting however as I was walking up there I had met a couple who had earlier spotted a Montagues Harrier which they were very pleased about. The SSSI sign also has a picture of a Roesel's Bush Cricket although I don't think that these were the crickets that I had seen jumping about earlier.
 |
 |
 |
(25) Lion Creek |
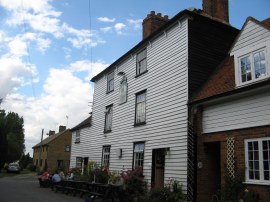
(26) Punch Bowl Pub, Paglesham |
(27) St Peters Church, Paglesham |
Back on course I followed the flood wall up to a road where the route heads to the left, across the top of Lion Creek, photo 24, and then continues ahead where the road bends sharply to the left, crossing a low wooden bridge to join a footpath running ahead through an area of marsh. This path gradually bends round to start heading up towards the church at Paglesham. The path soon heads into a field which had recently been ploughed, making it rather difficult to follow the route across it however I managed to stay more or less on course by following the line of telegraph poles that heads across the right hand side of the field. Reaching the end of the field the route bears to the left crossing the top of another small area of marsh land to reach Loftmans sluice where the route heads to the right, running alongside a drainage ditch. This is followed down to a concrete track which the route follows round to the left which leads to a minor road. Here the route continues ahead towards St Peters Church at Paglesham. Before I got to the church I stopped for a quick pint of orange juice and lemonade in the Punch Bowl Pub, photo 26. This was a much needed drink as I had been running a bit short of water and was feeling thirstier than usual due to my stomach. Heading past church, photo 27, the route joins an enclosed footpath which runs alongside the edge of fields.
 |
 |
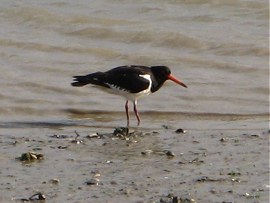 |
(28) Stannets Creek Lagoon |
(29) Barton Hall Creek |
(30) Oystercatcher |
Reaching the end of the field the route turns right along a farm track which soon heads round to the left. The path then skirts round some derelict barns to reach East Hall Road where the Roach Valley Way heads to the right, doubling back on itself past the barns. Reaching the end of the road the Roach Valley Way heads to the left down Paglesham Road and when the road bends round to the left the route continues ahead between the buildings of South Hall Farm. The route continues ahead along a broad hedge lined farm track which works its way round to Stannetts and then continues on to run along the edge of open fields. There then follows a rough and rather uneven stretch of field edge path, probably the result of the field having been ploughed right to the edge of the hedge earlier in the year, to reach a lagoon, photo 28. This was very popular with wildfowl and I spotted a considerably number of different birds out on the water. The path heads by a corner of this lagoon before joining a footpath on the right that continues on around a field edge. For a while the route heads through a narrow band of trees before continuing on along a farm track running along the edge of fields. Away to my left I could once again see the tower blocks of Southend on the horizon as the route starts making its way steadily done towards the River Roach. Passing by Barton Hall the route joins a surfaced track which is followed round towards Hampton Barns before the Roach Valley Way heads to the left along the flood bank running across the top of Barton Hall Creek, photo 29. The route then does a rather long dog leg round the side of the creek as the path makes its way round to the River Roach. I was starting to feel really tired at this point and it was really tempting to take a short cut across the fields however I persevered and went the long way round the route takes along the edge of the creek.
 |
 |
 |
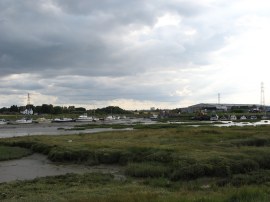
(31) River Roach |
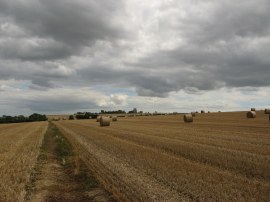
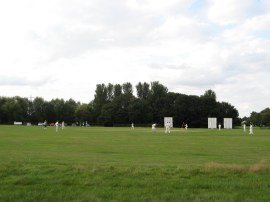
(32) Cricket Match |
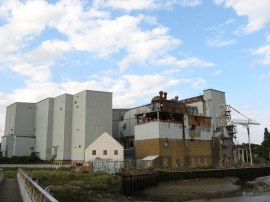
(33) Stambridge Mills |
Approaching the end of Barton Hall Creek I stopped for a rest on top of the flood bank before continuing upstream alongside the River Roach. While I was stopped I drank a bottle of Lucozade and also had a cereal bar and half a sandwich and these gave a much needed boost to my energy levels for the remainder of the walk back to Rochford and fortunately these had no ill effects on my stomach. The route winds its way along the flood bank besides the River Roach up towards a boatyard on the opposite bank, photo 31. Just before this is reached the route bears inland for a short distance before heading to the left along a grassy path that runs along the edge of a cricket ground, photo 32. There was a match taking place and somewhat surprisingly two wickets fell in the short time it took me to walk across the top of the ground. The route then continues ahead for a short distance through some trees, passing the Broomhill fishery and through a black metal gate to cross a small field to reach a road where the Roach Valley Way heads to the left. The route heads just a few yards down this road to reach the gates of an abandoned factory, Stambridge Mills, photo 33, where it joins a footpath on the right which skirts round the edge of the factory buildings. These used to be a flour mills and have been closed since the late 1990s after being in use for more than 100 years. Heading round the back of the factory the route crosses over the top of a small creek before continuing ahead along a rather dingy and litter strewn hedge lined footpath. This stretch of path becomes a bit more open and greener as the route heads into Rochford.
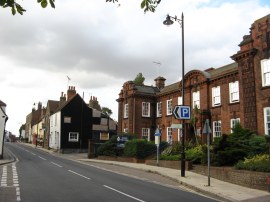 |
(34) Back at Rochford |
This reaches the Southend Road by the Horse and Groom pub from where it was just a short walk to the left up to a mini roundabout where I continued ahead into South Street, photo 34, and then turned almost immediately left, opposite the police station along Locks Hill which leads into the car park where I had started the day.
As usual I have uploaded the route of the walk which can be accessed here: Roach Valley Way.
Reaching the car I had walked a total distance of 23.6 miles. Despite being the longest walk I have done this year this was as much a mental challenge as much as a physical one. The paths were generally in good condition and easy to follow and the walk was mainly level however it took a lot of resolve to continue walking when I was unable to eat much and after such a bad nights sleep. I was perfectly able to continue even if my brain was trying to convince me I wasn't! As it was I was very pleased that I persevered and made it the whole way round the walk. I couldn't face any dinner when I got home but the next day I was back to normal.
If you would like to comment on this walk you can do so here:
![]() Back to:Walk index page
Back to:Walk index page
| ©2012 Bertuchi.co.uk. Please contact me using the email button on the right if you have any questions or comments regarding the site. Any feedback and additional information about places of interest on the walks is always welcomed. All rights reserved. Please contact me if you want to use any of the images or information from the site. ENJOY YOUR WALKING |
|