139 Miles to Birmingham
Other Links >>> |
|
GRAND UNION CANAL - Part 2
Brentford to Cowley Peachey Junction
|
|
139 Miles to Birmingham |
I did this walk on Sunday 3rd April 2011, some two months after I had walked the Paddington Arm of the grand Union Canal. I had had an inordinately long journey by tube from Walthamstow to Boston Manor station from where I then took the E8 bus down into the centre of Brentford. From there it was just a short walk from the bus stop outside the Police Station to the left along Half Acre and then the High Street from where I headed to the right along the cobble stone Dock Road.
 |
 |
 |
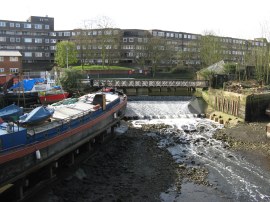
(1) Weir by Brentford Boatyard |
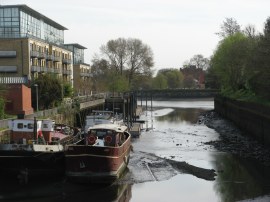
(2) View to the Thames |
(3) Thames Lock |
Dock Road soon leads down to cross over the weir stream by Brentford Boatyard, photo 1, from where it was just a few paces further to the lock that marks the junction of the Grand Union Canal with the River Thames. It was low tide when I was there and the entrance channel from the Thames to the canal was empty of water, photo 2. The Grand Union canal has a total of 101 locks and Thames Lock, photo 3, which comprises two locks side by side, is lock number 101.
 |
 |
 |
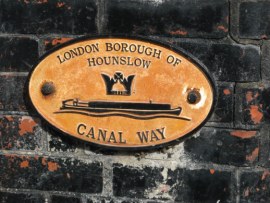
(4) Canal Way Plaque |
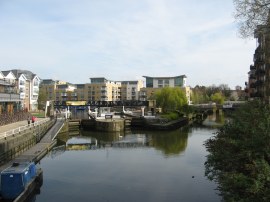
(5) Brentford Gauging locks |
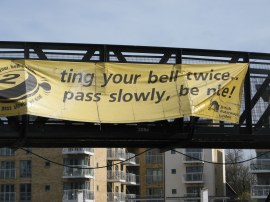
(6) Cycle nicely! |
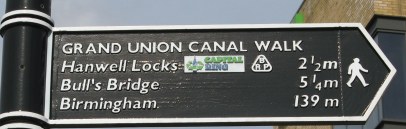
After taking a few photos of the area, and ringing my mother to say happy Mothers Day, I set off up along the canal bank where a metal plaque, photo 4, marked the canal path. After a few hundred yards the route reaches the first footbridge across the canal. On my map there is a path showing along both the left and right hand banks of the canal however despite looking I could not find any trace of a path along the left hand, or west bank, of the canal so I crossed over the footbridge to the opposite bank. Here a path heads down to Brent Way, which is followed for just a few yards, before the route heads sharp left once it had passed under a bridge to rejoin a narrow concrete path running alongside the edge of the canal with houses to the right and boat moorings on the left. This section of path is followed up to the A315 London Road where the route links up with the route of the Capital Ring along a section of path I had walked back in November 2006. A signpost at the junction of the routes showed the distance to Birmingham as 139 miles. Crossing the road the path passes the Brentford Gauging locks, photo 5, and the large area of moorings besides a Holiday Inn. On a footbridge by the locks was a banner reminding cyclists to sound their bells and pass slowly, photo 6.
 |
 |
 |
(7) Old Wharehouse nr Brentford Lock |
(8) Clitheroes Lock |
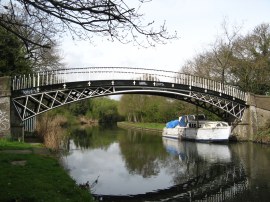
(9) Gallows Bridge |
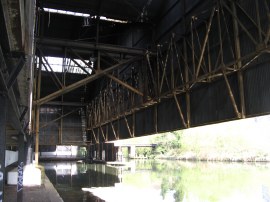
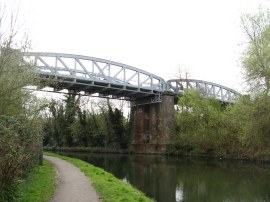
This whole area has been extensively re-developed although a short distance up from the locks the route passes under the remains of a wharf building that juts out over the footpath and canal and now makes an ideal roost for pigeons, photo 7. From the wharf the path heads up to reach another set of locks, Clitheroes Lock, photo 8. After passing the shiny, modern Smith Kline Beecham building the canal path soon starts taking on a more rural feel as it heads out of Brentford towards Boston Manor. Overhead there was a steady stream of planes flying overhead, with their front wheels down in preparation for landing at Heathrow. Further on, the route crosses the canal over a graceful cast iron bridge that had been built in 1820, photo 9, before passing under a metal bridge supported on tall brick pillars which carries the Piccadilly line tube service over the canal, photo 10.
 |
 |
 |
(10) Tube Bridge over the Canal |
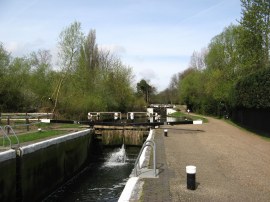
(11) Osterley Lock |
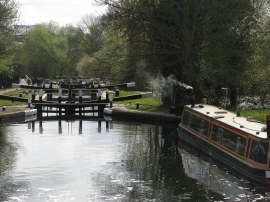
(12) The start of the Hanwell Locks |
The route then passes under the M4 motorway from where it is just a few hundred yards up to Osterley Lock, photo 11. The route passes a concrete memorial to the "British Waterways Kerr Cup Pile Driving Competition" recording the "Prize length of Piling 1959" before bending round to the left, passing an area of industrial units to the left of the path. Along this stretch of the canal I spotted two very large fish sunning themselves near the surface of the water although as usual the photo has not come out too well, they would however be a good catch for any angler fishing on the canal. Continuing on, the tow path reaches Hanwell Locks which marks the spot where the Capital Ring leaves the Grand Union canal and from now up until Bulls Bridge I was walking along a section of path I had not been along before. Hanwell Locks, photo 12, comprise a flight of six locks in quick succession. These locks raise the Grand Union Canal 53 feet in a third of a mile and they are now a scheduled ancient monument.
 |
 |
 |
(13) View back down the Hanwell Locks |
(14) Three Bridges |
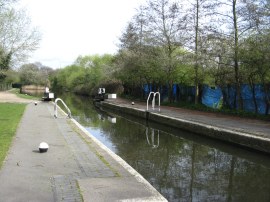
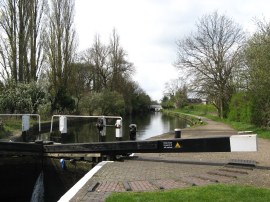
(15) Hanwell Lock |
Photo 13 was taken looking back down the Hanwell Locks above lock 95. A little further on the canal bends slightly to the left, the towpath running alongside a tall brick wall before reaching Three Bridges, or Windmill Bridge, photo 14. Three Bridges was constructed by Isambard Brunel and was completed in 1859. The canal is carried in a cast iron trough high above a rail line while a cast iron bridge carries Windmill Road over the canal. For a while the path runs alongside the open space of Glade Lane Canal side park to the right and a little further on the route heads by lock 91, also known as Hanwell Lock, photo 15.
 |
 |
 |
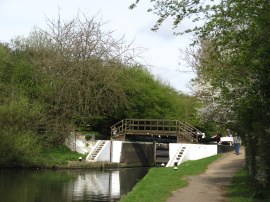
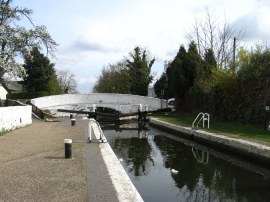
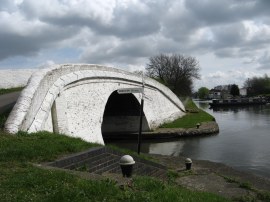
(16) Norwood Top Lock |
(17) Grand Union Canal, Southall |
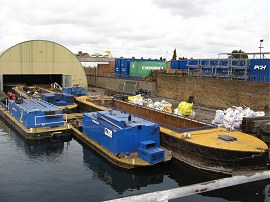
(18) Adelaide Dock |
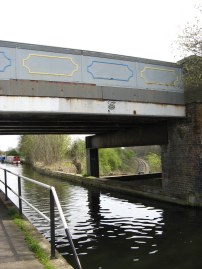
Not much further on the path passes under the a small white painted brick bridge over the canal which sits by the entrance gates to lock 90, Norwood Top Lock, photo 16. After this lock there is a long straight section of canal, photo 17, which leads towards Southall running through a predominantly suburban residential area. Passing besides Bixley playing fields the large golden dome of a temple was visible away to the right, shining brightly in the sunlight. A little further on the route heads under the bridge which carries the A3005 Norwood Road across the canal and passes over the small humped bridge across the entrance to a small canal basin, Adelaide Dock, housing a few barges, photo 18.
 |
 |
 |
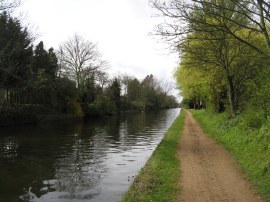
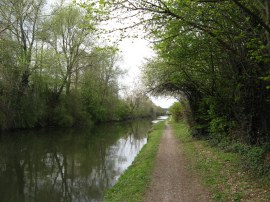
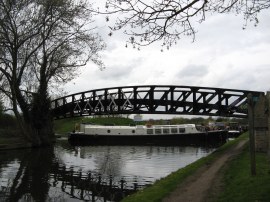
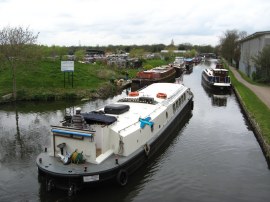
(19) Heading towards Hayes |
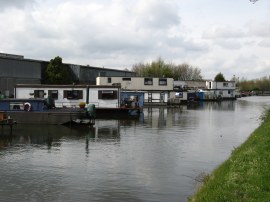
(20) Houseboats nr Hayes |
(21) Paddington Arm |
Passing under a small brick road bridge the route passes the Old Oak Pub, where next door is a handy canal side convenience store. The route of the canal then runs along another long straight stretch that leads up towards Hayes with the buildings of the Nestle Factory growing steadily larger ahead as I headed along the path, photo 19. On the canal bank I passed by what was certainly several loaves worth of bread crumbled up in a line along the canal bank which reminded me of the woman I saw emptying out plastic bags of food along the canal when I was walking the Paddington Arm. I'm all for the feeding of the ducks and birds but this indiscriminate dumping of large quantities of poor quality food cannot be of much help to the ducks and must surely encourage rats. On this stretch of path I also spotted a Coot with some ducklings, the first ducklings that I have seen this year. The towpath then passes by some strange looking houseboats on the opposite bank, photo 20, and 6.2 miles from the Thames at Brentford I reached Bulls Bridge where the Paddington Arm of the Grand Union Canal, photo 21, joins the canal from the right. I stopped here for a short lunch break, sitting in the sun on the steps by the bridge.
 |
 |
 |
(22) Bulls Bridge |
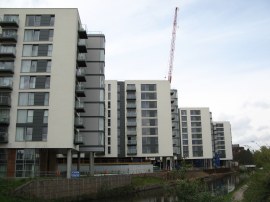
(23) High Point Village |
(24) Grand Union Canal, Hayes |
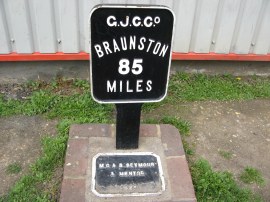
Soon after Bulls Bridge, photo 22, the path heads by the large nestle Factory where the surrounding air was smelling very strongly of roasting coffee. The path passes under the A312, where the route of the London Loop joins up with the tow path for a short while, one of several places the two paths link up between here and Harefield. The canal passes the new housing developments of High Point Village in the centre of Hayes, photo 23, before making its way through the industrial outskirts of Hayes although there is often a fair amount of greenery obscuring what is on the either side of the canal, photo 24. It was a real shame though to see such large amounts of litter on the canal bank behind some of the factory units. By mile marker 86 the London Loop leaves the canal path off to the right and I was once again walking along another stretch of path I had not previously walked along.
 |
 |
 |
(25) 85 miles to Braunston |
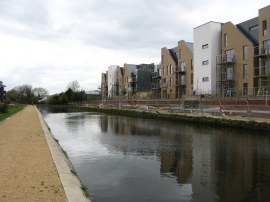
(26) New housing in Yiewsley |
(27) Cowley Peachey junction |
The route continues making its way through the London Borough of Hillingdon towards West Drayton along another long straight section of canal leading to the bridge under the A408 and a short distance further on the much older brick bridge 195. Passing under bridge 193 the London Loop rejoins the Grand Union Canal and the route soon heads past West Drayton Station. A short distance further on, by bridge 191 which carries Trout Road across the canal, the canal side towpath was closed due to the building of some new houses and a superstore besides the path, photo 26. There was no signed diversion however I was able to join a path that ran along the opposite bank of the canal in front of more new housing. Unfortunately though this path reached a dead end not far past the end of the houses and I had no option other than to retrace my steps back to Trout Road. Back at the road, which incidentally is also at the eastern end of the Beeches Way, I then headed the other way up the road to the Yiewsley where I turned to the left. I headed past a petrol station and over a small stream before turning left down a narrow gravel path running down the side of a Pets at Home store and then round the back of Argos that leads back up to the canal bank close to Cowley Peachey junction, photo 27
 |
(28) Cowley Peachey junction |
Reaching the junction, photo 28, I then turned to my left and headed over the junction bridge to start my walk down the Slough Arm of the canal.
As usual I have uploaded the route of the walk which can be accessed here: Grand Canal Stage 2 Route.
This was by no means a classic walk, though the area around Brentford was interesting, as was Hanwell Locks, and I have filled in the gaps in the canal path up to this point that I hadn't previously walked. Apart from that it was a fairly flat walk, in more senses than just the terrain, through the suburban edge of London.
If you would like to comment on this walk you can do so here:
![]() Back to:Walk index page
Back to:Walk index page
| ©2012 Bertuchi.co.uk. Please contact me using the email button on the right if you have any questions or comments regarding the site. Any feedback and additional information about places of interest on the walks is always welcomed. All rights reserved. Please contact me if you want to use any of the images or information from the site. ENJOY YOUR WALKING |
|