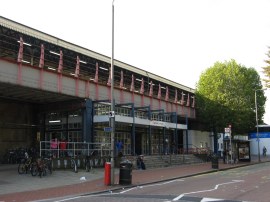
(1) Clapham Junction station
(2) Bridges Court
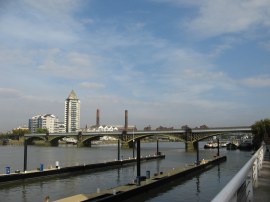
(3) View towards Battersea Railway Bridge
Other Links >>> |
|
THAMES PATH - Part 12
Battersea to Greenwich
Myself and Sara did this stage of our walk along the Thames Path on Saturday 24th September 2011. The day started quite bright with excellent light for taking photos although it gradually became more cloudy and overcast as we progressed down river.
|
|
|
|
(1) Clapham Junction station |
(2) Bridges Court |
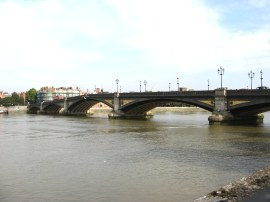
(3) View towards Battersea Railway Bridge |
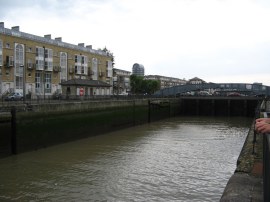
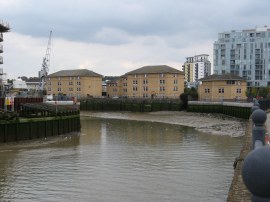
We met up at Clapham Junction station, photo 1, before making our way back down towards the River Thames and Bridges Court, photo 2, where we had left the Thames Path at the end of our previous stage. From their we headed past the entrance to Battersea Heliport and followed Bridges Court round to Lombard Road, an area where the route of the path on the ground is slightly different to that shown on the map. Lombard Road is only followed for a short distance before the route heads back to join a waterfront path with views down the river towards Battersea Railway Bridge and the Chelsea Harbour development, photo 3.
 |
 |
 |
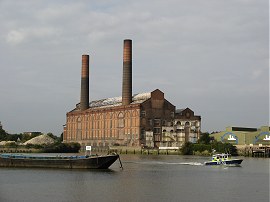
(4) Lots Road Power Station |
(5) Battersea Bridge |
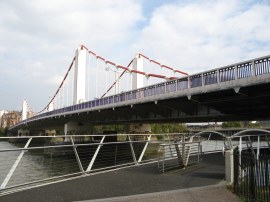
(6) Albert Bridge |
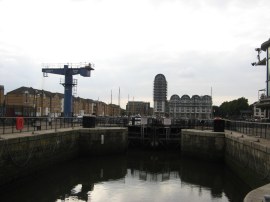
Just before the railway bridge is reached the path heads briefly back up to the road to cross under the rail lines before heading back to the river. The path passes the Lots Road Power Station, photo 4, on the opposite bank before heading down to St Mary's Church. We skirted the churchyard and headed on down to Battersea Bridge, photo 5. The route heads up to cross the road before continuing the quarter of a mile further down to reach the Albert Bridge, photo 6. On the way to the bridge the route passes a, narrow, muddy basin running away from the river where there were a couple of large boats moored alongside the new housing and office developments.
 |
 |
 |
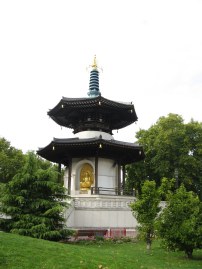
(7) London Peace Pagoda |
(8) Chelsea Bridge |
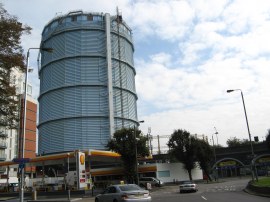
(9) Gasholder by Queens Circus |
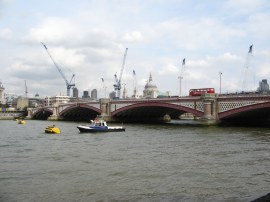
Crossing the road by Albert Bridge the Thames Path then heads into Battersea Park, the broad promenade popular with joggers and dog walkers. The path passes the London Peace Pagoda, photo 7, as it makes its way through the tranquil green space, where there are also some handily situated public toilets, down towards Chelsea Bridge, photo 8. Reaching the bridge the route has to once again headed away from the river in order to skirt round the Battersea Power Station where there is currently no waterfront access. The path heads up the side of Battersea Park to Queens Circus where the route leaves the park and heads down Prince of Wales drive, passing by a large blue painted gasholder, photo 9.
 |
 |
 |
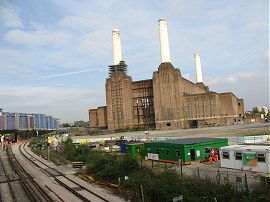
(10) Battersea Power Station |
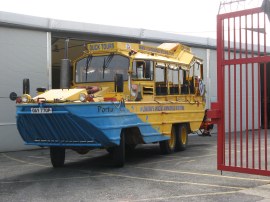
(11) Duck Tours vehicle |
(12) Vauxhall Bridge |
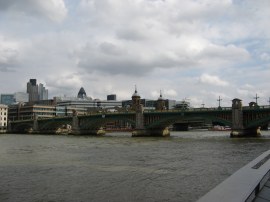
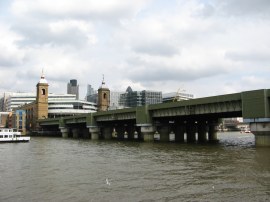
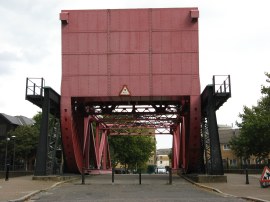
The route then joins the A3205 Battersea Park Road and passes under the rail lines running from Victoria Station before heading past the buildings of the Battersea Dogs home where we were able to spot a number of cats sunning themselves in the windows. The path passes Battersea Power Station, photo 10, before heading down Kirtling Street where spotted one of the London Duck tours vehicles parked outside a factory unit, photo11. Later I just caught sight of one the vehicles as it headed up a slipway out of the river although it was too far away to get a photo. From Kirtling Street the route can normally join a path that leads down to the Thames although this was closed for building works when we went by and we ended up following a rather circuitous route back to the A3205, now called Nine Elms Lane. After another stretch of walking along this busy road we were able to head down a path back to the river and the William Heath Walk which is followed down almost to Vauxhall Bridge, photo 12. Here the route makes one more short detour away from the river, heading round a building site before heading back between the new buildings to the river.
 |
 |
 |
(13) View down the Thames from Vauxhall |
(14) Lambeth Bridge |
(15) Houses of Parliament |
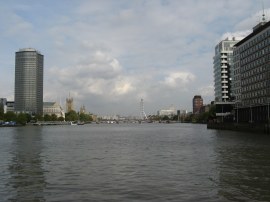
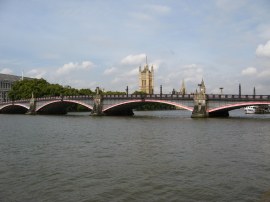
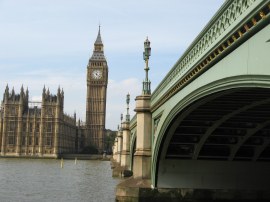
A newish path leads under Vauxhall Bridge and then follows the Albert Embankment down towards Lambeth Bridge with the Millbank Tower on the opposite bank, photo 13, while on our side of the riverbank was the headquarters of the International Maritime Organisation which had an impressive display of flags flying from the roof. The path continues down the Embankment before passing under Lambeth Bridge, photo 14. On the other side of the road were there were brief glimpses of Lambeth Palace to the right and away to the left on the other side of the river, the Houses of Parliament, photo 15. The tide had been coming in when we started the walk but by this time it had definitely started to turn.
 |
 |
 |
(16) Big Ben and Westminster Bridge |
(17) The London Eye |
(18) South Bank Street Entertainer |
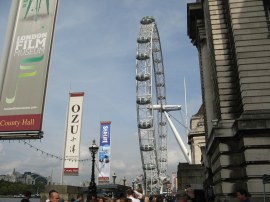
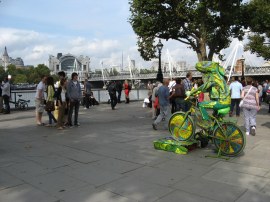
We were now approaching the tourist heartland of London and the path lining the river bank became increasingly busy and crowded as we headed on towards Westminster Bridge, photo 16. Passing under the bridge we headed past the old County Hall Building, a place I remember wandering round when I was a motorbike courier, before heading besides the London Eye where there were queues of people snaking across the path waiting for their ride. This area of the South Bank is particularly popular with street entertainers and being a Saturday afternoon these were out in full force to entertain the crowds though I'm not exactly sure what to make of the frog on the bicycle, photo 18.
 |
 |
 |
(19) Food Festival on the South Bank |
(20) Waterloo Bridge |
(21) Blackfriars Bridge |
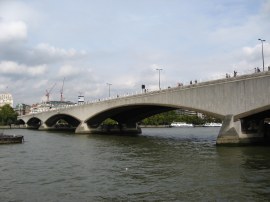
Not far below the London Eye, by Jubilee Gardens a food festival was taking place, photo 19, the crowds almost completely blocking the path. While much of the food did look very tempting, particularly as I did not have a pack lunch with me, it was also quite expensive and we headed on. Next up came the Hungerford Rail Bridge and then South Bank Arts Centre where the path congestion began to ease slightly as we curved round towards Waterloo Bridge, photo 20. The Thames Path then passes the National Theatre and heads on down past the Oxo Tower towards Blackfriars Bridge, photo 21.
 |
 |
 |
(22) View over to St Pauls Cathedral |
(23) Millennium Footbridge |
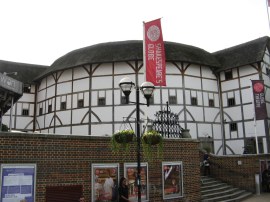
(24) Globe Theatre |
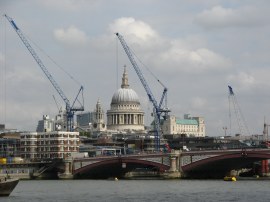
Rising above the bridge on the opposite bank was the dome of St Pauls Cathedral, photo 22, surrounded by the tower cranes that seem to be almost ever present in Central London. Reaching the Blackfriars Bridge building works meant the path had to leave the river, heading up Blackfriars Road then left into Southwark Street and then left again into Hopton Street which we followed round to rejoin the river by the old Bankside Power Station, now housing the Tate Modern. The route then heads past the Millennium Footbridge, photo 23, and the Globe Theatre, photo 24, before heading on to Southwark Bridge.
 |
 |
 |
(25) Southwark Bridge |
(26) Cannon Street Rail Bridge |
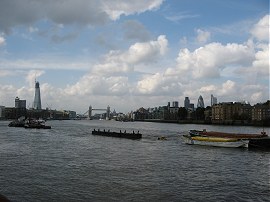
(27) The Shard |
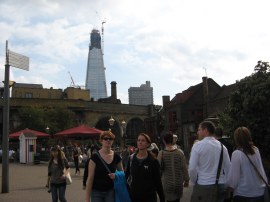
The route heads under Southwark Bridge, photo 25, before bearing slightly away from the river to pass under the Cannon Street Rail Bridge, photo 26. Ahead of us we could see the Shard rising up on the horizon, photo 27. The building, which will be the tallest in London looks to be almost complete externally with only the top of the cladding remaining to add. Close to the top there was a tower crane which seemed to be attached to the main building; I can see this from the top of floor of the building where I work and I had spent a meeting a short time earlier watching beams being lifted up to the top of the building and wondering how the crane would be dismantled when its work is finished.
 |
 |
 |
(28) London Bridge |
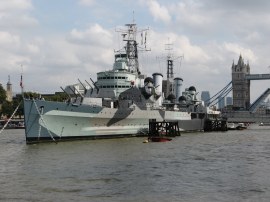
(29) HMS Belfast |
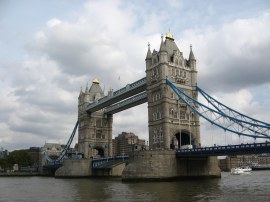
(30) Tower Bridge |
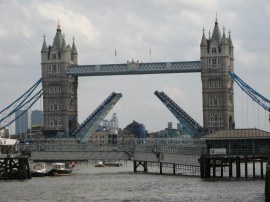
Once under the rail bridge the Thames Path continues ahead along Clink Street, where I had a brief stop to buy a sandwich for lunch. Reaching the end of the street the route passes a replica of the Golden Hind and then Southwark Cathedral. Heading round the side of the Cathedral the path heads along Montague Street, under London Bridge, and into Tooley Street before heading through a gap in the office buildings to rejoin the riverside just below London Bridge, photo 28. The route heads by Hay's Wharf, where there is a large central atrium between the old warehouse buildings with a very strange sculpture in the middle, and on to HMS Belfast, photo 29. Many years ago I went round the HMS Belfast with my son when he was about four or five years old and his glasses, which were brand new, fell off while he was looking down from the top of some large central staircase. Against the odds when we walked down to the bottom we found not only the frames but both the lenses too despite them having bounced all over the place on the way down. Looking downstream while we were by the Belfast we noticed that Tower Bridge was raised, photo 30, the first time I think I have ever seen the two spans up and despite the distance I was able to get a reasonably decent photo.
 |
 |
 |
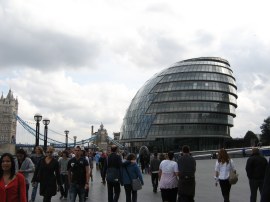
(31) City Hall |
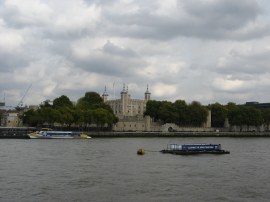
(32) Tower of London |
(33) Tower Bridge |
This was another crowded section of the path as we made our way down towards Tower Bridge, passing by the City Hall, photo 31, and on the opposite bank, the Tower of London, photo 32, before heading under Tower Bridge, photo 33, into Shad Thames.
 |
 |
 |
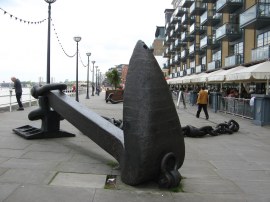
(34) Anchor by Butlers Wharf |
(35) St Saviour's Dock |
(36) View back to the City of London |
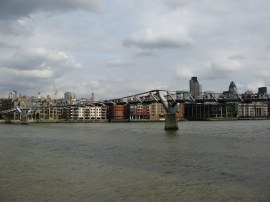
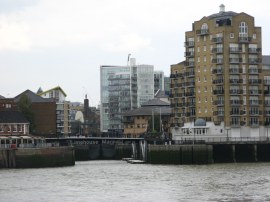
This narrow street is lined by tall buildings on either side however the Thames Path soon heads through a small alley that leads back to the waterfront by Butlers Wharf, where there was a broad path running alongside the river which was pleasantly free from crowds. Moored in the river was a very sleek and impressive looking Super Yacht, the 223ft long "Aviva", launched in 2007 and apparently the 80th! longest yacht in the world. Back on land, lying across the path was a giant anchor and chain, photo 34, a reminder of the areas industrial past. Heading on towards Bermondsey the route passes the entrance to St Saviour's Dock, photo 35, which was once the spot where the River Neckinger entered the Thames. Looking upstream, there were very good views back up towards the City of London, photo 36.
 |
 |
 |
(37) Sara at our lunch stop |
(38) Bridge by the Surrey Basin |
(39) View over to Limehouse Basin |
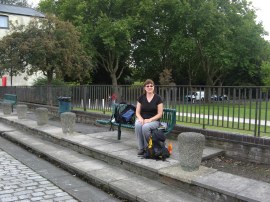
The route then heads along Bermondsey Wall West, the path heading away from the river and up to Chambers Street. This is followed to its junction with Loftie Street where the Thames Path heads to the left to join Bermondsey Wall East and soon Fountains Green Square where another Thames side promenade is joined. This is followed down towards Rotherhithe, briefly heading back up to Bermondsey Wall East to pass some waterfront properties before joining the waterfront close to a green space where we stopped to have our lunch, photo 37, close to the Angel Pub. Having eaten we then headed up to King Stairs Close and through a passageway that leads up to Rotherhithe Street. Sara's son had spotted that she was out walking the Thames Path and had been in contact earlier in the day and we met up with him and his girlfriend close to Rotherhithe Station with almost perfect timing. We then headed on as the route makes its way down to the big red bridge that marks the entrance to the old Surrey Basin, photo 38. Once over the bridge the route rejoins a waterfront path with the occasional diversions up to Rotherhithe Street to skirt waterfront buildings. On the opposite bank we passed the entrance to the Limehouse Basin, photo 39, an area I have walked to on several occasions and where I finished my walk along the river Lea.
 |
 |
 |
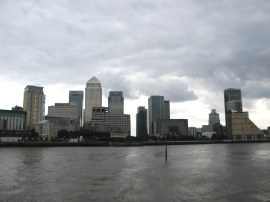
(40) View over to Docklands |
(41) Surrey Docks Farm |
(42) Entrance to Greenland Dock |
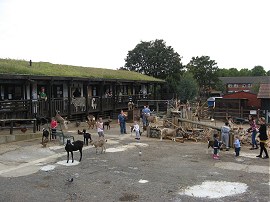
As we were heading down this section of path the river begins heading round to the South and the buildings of Dockland came into clear view on the opposite side of the river, photo 40. The path then heads through the grounds of the Surrey Docks Farm where we made a short detour away from the waterfront to have a look at the animals, photo 41, which included a large number of goats and some ducks with very extravagant plumage. Not far below the farm we reached the entrance to Greenland Dock, photo 42, the path crossing over a bridge by the entrance.
 |
 |
 |
(43) South Dock |
(44) View down river to Greenwich |
(45) Prince Street |
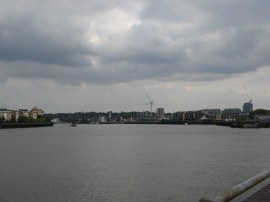
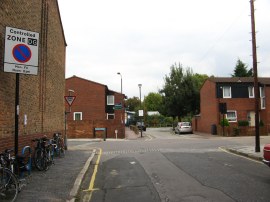
Not far below Greenland Dock the route crosses over the entrance to South Dock, photo 43, the dock as with so much of this area surrounded by new housing. As we headed downstream we could see the river curving away round to our destination at Greenwich, photo 44, the weather now much more murky and overcast than when we set off. The path heads down the waterfront along Deptford Wharf and the Deptford Strand before the route has to take a fairly lengthy detour away from the river round an area of new housing and old warehouses that will probably become the site of more new housing. Leaving the river we headed up Barlfeur Lane, into Longshore for a few yards before heading on into Bowditch. Here we headed diagonally to the right across an area of grass up to Grove Street which we followed off to the left round to Sayes Court Park. The Thames Path then heads through the park to Sayes Court Street before heading to the left along Prince Street to its junction with Watergate Street, photo 45.
 |
 |
 |
(46) Deptford Creek |
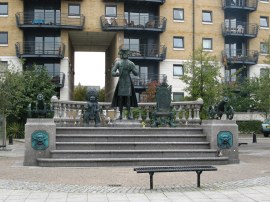
(47) Peter the Great Statue, Deptford |
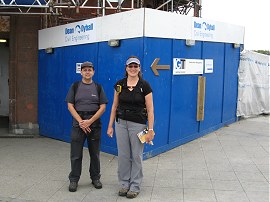
(48) The end point of stage 12 |
The route heads to the left down Watergate Street which is followed round into Borthwick Street, the road running past the front of old waterfront building where only the wall remained, supported by a framework of scaffolding. From Borthwick Street the route heads to the left by some flats to join another section of waterfront path which is followed up the short distance to the entrance to Deptford Creek. In front of the new housing, at the creek entrance, was a statue of Peter the Great, photo 47. The statue, erected in 2001, is a gift from Russia and commemorates the 1698 visit of Peter the Great to Deptford to study shipbuilding. The Thames Path then heads up alongside the creek to join Creek Road to cross over the Creek. The path soon heads to the left down Norway Street and right into Thames Street before turning to the left down Horseferry Place which leads back to the waterfront at Greenwich and the Cutty Sark Gardens. This always used to be a pleasant place to visit, and doubtless will be again, but with the Cutty Sark still wrapped up after the 2007 fire and a large area of the gardens hidden behind boarding due to building works it looked rather dismal when we were then towards the end of 2011. We finished the walk by the entrance to the Greenwich foot tunnel, photo 48, which was also surrounded by scaffolding. From there I headed upper to the Docklands Light Railway to start my journey home.
As usual I have uploaded the route of the walk which can be accessed here: Thames Path Stage 12 Route.
Reaching the end of the walk we had walked just over 15 miles for the day of which about 14.5 was along the Thames Path. While it was pleasant to have the company of Mike and Ana for the last few miles of the walk unfortunatley the stretch they joined us on was probably one of the least attractive parts of the entire path. However all in all this had been another good days walking and we had certainly got see a variety of sites as we headed through the centre of London and I kept thinking how very different it was from the wide open green fields at the start of the walk. Finishing at Greenwich leaves us just a short walk to do to the finish at the Thames barrier although we are then going to continue our walk along the South East extension down to Crayford Ness.
If you would like to comment on this walk you can do so here:
![]() Back to:Main index page
Back to:Main index page
| ©2012 Bertuchi.co.uk. Please contact me using the email button on the right if you have any questions or comments regarding the site. Any feedback and additional information about places of interest on the walks is always welcomed. All rights reserved. Please contact me if you want to use any of the images or information from the site. ENJOY YOUR WALKING |
|