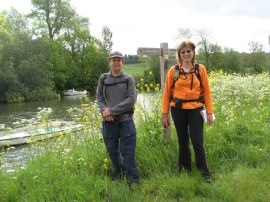

(1) The start of stage 6 at Lower Radley
(2) River Thames, Lower Radley
(3) Carfax Conduit
Other Links >>> |
|
THAMES PATH - Part 6
Lower Radley to Wallingford
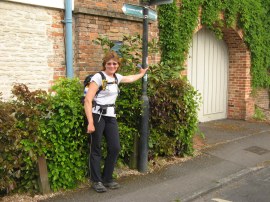
I did this walk with Sara on 8th May 2011. After our earlier weekend walks along the path we were now near enough home to squeeze in a day walk along the river, in fact in the early morning Sunday traffic I had a very quick journey over to Wallingford where I met up with Sara before driving over to Lower Radley to resume our walk. My return journey later in the day took almost twice as long!
|
|
|
|
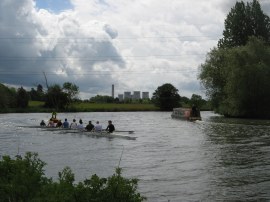
(1) The start of stage 6 at Lower Radley |
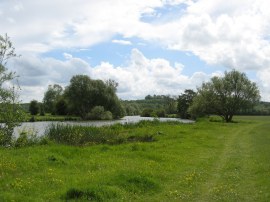
(2) River Thames, Lower Radley |
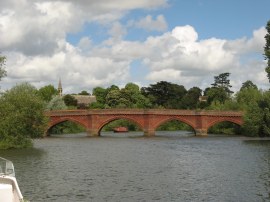
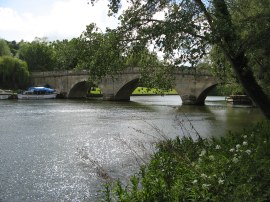
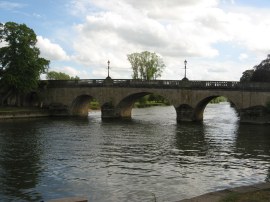
(3) Carfax Conduit |
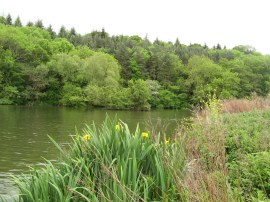
From our parking spot in Lower Radley we headed down the track which runs down to the Radley College boathouse where we joined the Thames and a cyclist having a break kindly took our photo, photo 1. From there we headed off down the riverbank along a pleasant tree lined section of path, photo 2. As we were walking along the path we were passed by a number of mainly female rowers including a coxed four heading along at a very decent pace. Not far from the start we also headed by the Carfax Conduit, photo 3, on the opposite bank. The conduit building used to supply water to Oxford before being moved to its current location in 1787.
 |
 |
 |
(4) |
(5) Entrance to Swift Ditch |
(6) Abingdon Weir |
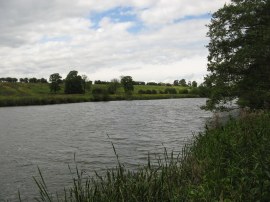
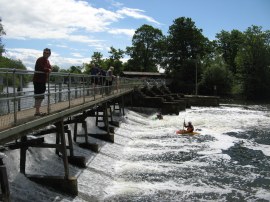
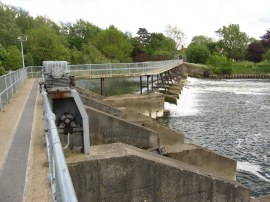
It was then on along the river bank towards Abingdon. Away on the opposite bank was a low hill running parallel to the river, photo 4. At first this was covered in woodland then fields. The route of the Thames flows in a big loop by Abingdon and although hidden from view the Thames was only a couple of miles or so the other side of the hill although our walk to that point was considerably longer. The route passes under a railway line and heads past some old gravel working although these remained largely hidden from view, the precence noted more on the map than on the ground. As we approached Abingdon we passed the entrance to Swift Ditch, photo 5, which is a backwater of the River Thames. This was formerly the primary navigation channel and with the main river, it creates the large island of Andersey Island. After heading away from the riverside for a while the Thames Path returns back to the river at Abingdon where the route crosses over the weir to the opposite bank. The Thames weirs are growing ever larger as we head downstream and a number of canoeists were bobbing around in the turbulent waters, photo 6.
 |
 |
 |
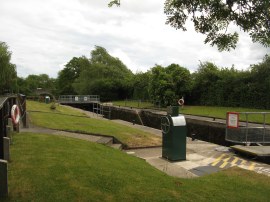
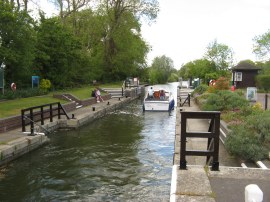
(7) Abingdon Lock - 14 |
(8) Abingdon Bridge |
(9) Abingdon |
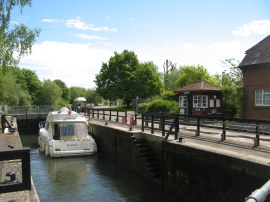
We then crossed over Abingdon Lock, photo 7, which is lock 14 from the source, before heading to the right along a grassy meadow that leads the short distance to Abingdon Bridge, photo 8. After passing through an arch under the bridge we followed the river through Abingdon with buildings away to the right, photo 9, and playing fields and meadows on our bank. On the opposite bank was a cast iron bridge which marked the old entrance of the Wilts & Berks Canal to the Thames although this is now disused and built over. A little further downstream a new connection was opened with the Thames by Culham Lock although this currently only runs for 150 yards but may one day link up with the original route of the canal. There was a small yacht club in Abingdon and a couple of sail boats where taking advantage of the strong wind that was blowing, one of which capsized as we headed by while attempting to do a quick turn; it seemed a really hard struggle for the sailor to then get the sail back out of the water. Leaving the built up area of Abingdon behind we passed over a bridge which marked where the other end of Swift Ditch enters the Thames.
 |
 |
 |
(10) View towards Didcot Power Station |
(11) Culham Lock - 15 |
(12) Bridge below Culham Lock |
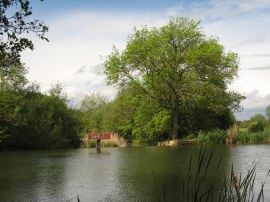
Just before we reached this bridge the river turns a slight corner and ahead of us we could see the Didcot Power Station, photo 10, a building that was to remain visible for much of the rest of the day, which ever way the river twisted and turned. The path continues down alongside more meadows and fields before turning sharp left as the Thames Path follows the route of the Culham Cut down to Culham Lock, photo 11. The Culham Cut was completed in 1809 to avoid the obstruction caused by a mill on the original route of the river in Sutton Courtenay. Just below the lock the route heads by a small road bridge, photo 12, and then out along a long rural stretch of path along to the Clifton Cut.
 |
 |
 |
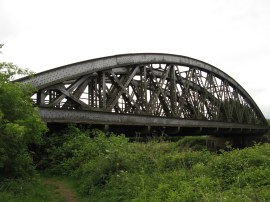
(13) Appleford Railway Bridge |
(14) The Clifton Cut |
(15) Clifton Lock - 16 |
At first the route runs over an area of rough ground before joining a path which runs alongside a succession of fields. The path heads under the Appleford Railway Bridge, photo 13, before following the Thames as it curves round past the weir over the entrance to the old channel and down the Clifton Cut, photo 14, which runs for about a mile down to Clifton Lock, photo 15, where we stopped for our lunch on a conveniently sited bench.
 |
 |
 |
(16) Clifton Hampden Bridge |
(17) Medley Footbridge |
(18) Days Weir and the Wittensham Clump |
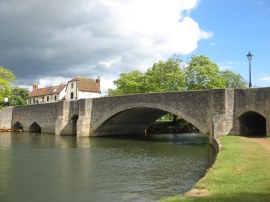
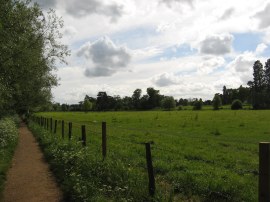
Just below the lock the two routes of the Thames link back up and the river flows alongside a couple of more fields to reach the attractive brick built Clifton Hampden Bridge, photo 16, which was opened in 1867. This was once a toll bridge although these ceased to be collected in 1946 when the bridge was purchased by the council. The Thames Path crosses the bridge over the river and passes through a small area of trees before heading out along the edge of some wide open meadows, photo 17. On the opposite bank were a number of fine houses in the village of Burcot heading down to the waters edge. Having been heading almost due north towards the Clifton Lock the Thames curves round once again to be heading almost due south as it makes its way alongside the meadows towards Little Wittenham with the trees of the Wittensham Clumps prominent ahead, photo 18. Above us we spotted a number of Red Kites flyoing about and on the water was a Great Crested Grebe.
 |
 |
 |
(19) Days Lock - 17 |
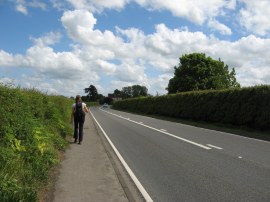
(20) Sara heading along the A4074 |
(21) Thames flood markers |
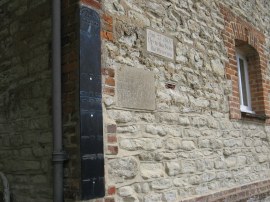
Reaching a weir, the path crosses back over the river and then head over Days Lock, photo 19, to join the opposite bank. The towpath then continues alongside more fields with the tree covered slopes of Little Wittenham Wood on the opposite bank before crossing a bridge over the rather overgrown junction of the River Thame and the Thames. After heading alongside a couple of more fields the Thames path then has to leave the riverbank and divert up to the A4074 Henley Road, photo 20, which is followed towards the village of Shillingford. The riverside footpath does continue ahead for a short distance further up to the site of the old ferry that used to carry traffic across the river but as the ferry no longer exists this is now a dead end. Reaching Wharf road the route heads back down the river before heading to the left by a house along an enclosed stretch of footpath. On the side of the house were a number of markers showing the depth of the various Thames floods over the years, photo 21.
 |
 |
 |
(22) Shillingford Bridge |
(23) Benson Weir |
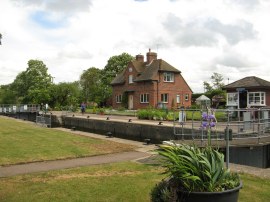
(24) Benson Lock - 18 |
The enclosed footpath leads down to a lane which is followed to the Walllingford Road, close to the Shillingford Bridge, photo 22. The route heads to the right along the road before heading down a path alongside the bridge which soon leads back to the Thames. On the opposite bank is an area of mobile homes situated beneath Shillingford Hill but these are soon left behind as the route heads along yet another tree lined section of footpath and along the edge of fields towards the village of Benson. Besides one of the fields three women appeared to be getting into wet suits, I presume to go swimming in the river, although the water must have been awfully cold. We had a short stop besides the water for another snack before reaching the edge of Benson where the path heads by a marina where there is a cafe and picnic benches. Here the route once again heads up to join a lane running past houses before heading down to Benson Weir, photo 23. The route heads across the long weir which winds its way over the river and continues over Benson Lock, photo 24 to join the right hand bank once again.
 |
 |
 |
(25) Wallingford Castle Meadows |
(26) Wallingford Bridge |
(27) Sara at the end of the walk |
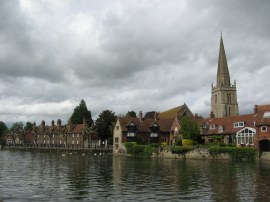
Once over the lock the route joins a fence lined path which is soon running alongside Wallingford Castle Meadows, photo 25. Wallingford Castle was destroyed in 1652 after the Civil War and now all that remains are a few areas of masonery rising above the ground on the nearby earthworks. From there it was just a short walk further until we reached the edge of Wallingford by Wallingford Bridge, photo 26. We stopped for a quick drink at a riverside pub besides the bridge, as Man Utd scored two quick goals against Chelsea to virtually assure themselves of the seasons Premier League title. The route then crosses the High Street and heads down Thames Street, photo 27, which is where we finished this stage of our walk at the junction with New Road where there is the car park that we had parked in at the start of the day
Reaching the car we had walked a total distance of 18 miles. This had been another good walk down the Thames with plenty to see. The landscape around the river has changed considerably and is now much less open than the area's we passed through at the start of the walk with many more fences and hedges alongside the path although it is still a predominantly rural landscape.
As usual I have uploaded the route of the walk which can be accessed here: Thames Path Stage 6 Route.
If you would like to comment on this walk you can do so here:
![]() Back to:Main index page
Back to:Main index page
| ©2012 Bertuchi.co.uk. Please contact me using the email button on the right if you have any questions or comments regarding the site. Any feedback and additional information about places of interest on the walks is always welcomed. All rights reserved. Please contact me if you want to use any of the images or information from the site. ENJOY YOUR WALKING |
|